Hyundai Sonata LF: Dual Clutch Transmission Control System / Shift Lever Repair procedures
Hyundai Sonata LF 2014-2019 Service Manual / DCT (Dual Clutch Transmission) System / Dual Clutch Transmission Control System / Shift Lever Repair procedures
| Removal |
| 1. |
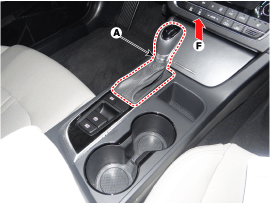
Disconnect a boots from the console upper cover. |
| 2. |
Pull the knob (A) in the direction of "F" and remove the knob.
|
| 3. |
Remove the floor console assembly.
(Refer to Body - "Floor Console") |
| 4. |
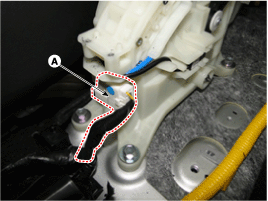
Disconnect the connector (A) from the shift lever.
|
| 5. |
Disconnect the control cable (A).
|
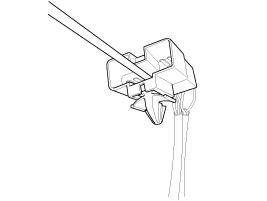
| 6. |
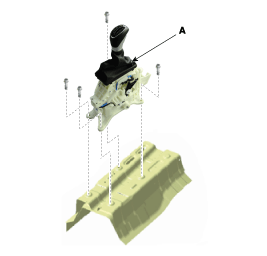
Remove the bolts and then shift lever assembly (A).
|
| 7. |
Remove the P position switch mounting bracket (A).
|
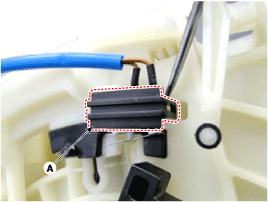
| 8. |
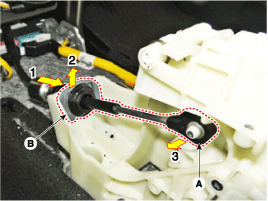
Disconnect the P position switch (A) and shift lock solenoid (B).
|
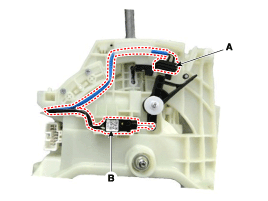
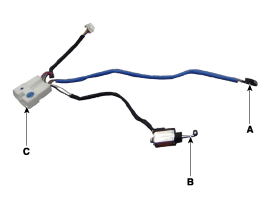
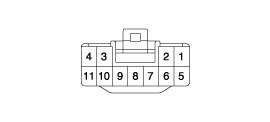
| 9. |
Disconnect the main connector (A) from the shift lever.
|
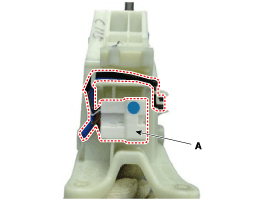
| 10. |
Remove the mounting bracket (A) of terminals from the main connector.
|
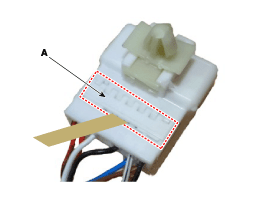
| 11. |
Remove each terminals of the P position switch (A), shift lock solenoid (B) from the main connector (C).
|


| Installation |
| 1. |
Install in the reverse order of removal.
|


Other information:
Hyundai Sonata LF 2014-2019 Service Manual: Front Washer Motor Repair procedures
Inspection Front Washer Motor 1. With the washer motor connected to the reservoir tank, fill the reservoir tank with water. Before filling the reservoir tank with water, check the filter for foreign material or contamination...
Hyundai Sonata LF 2014-2019 Service Manual: Specifications
Specifications ItemSpecificationMaster cylinderTypeSingleI.D. mm(in)NON EPB ?22.22mmEPB?23.81mmPiston stroke mm(in)45±1mm(1.77±0.039in)Fluid level sensorProvidedBrake booster?Type11" SingleBoosting ratio9:01Front disc brakeTypeVentilated discDisc O...
Categories
- Manuals Home
- Hyundai Sonata Owners Manual
- Hyundai Sonata Service Manual
- Brake System
- Body (Interior and Exterior)
- Heating, Ventilation and Air Conditioning
- New on site
- Most important about car

Copyright © 2026 www.hsonatalf.org