
Hyundai Sonata LF: Rear Suspension System / Rear Upper Arm Repair procedures
Hyundai Sonata LF 2014-2019 Service Manual / Suspension System / Rear Suspension System / Rear Upper Arm Repair procedures
| Replacement |
| 1. |
Raise the vehicle, and make sure it is securely supported. |
| 2. |
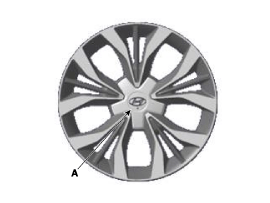
Remove the wheel cap (A).
|

| 3. |
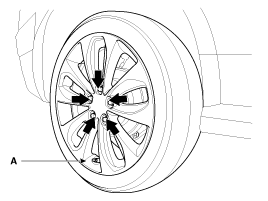
Remove the front wheel and tire (A) from front hub.
|
| 4. |
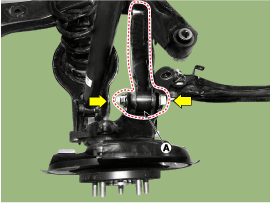
Remove the upper arm (A) by loosening the bolt & nut from the rear carrier.
|
| 5. |
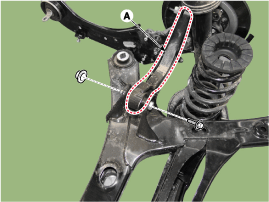
Loosen the bolt & nut and then remove the rear upper arm (A) with the sub frame.
|
| 6. |
Installation is the reverse of removal. |
| Inspection |
| 1. |
Check the bushing for wear and deterioration. |
| 2. |
Check for all bolts and nut. |
 Rear Shock Absorber Repair procedures
Replacement 1. Raise the vehicle, and make sure it is securely supported. 2. Remove the wheel cap (A). Be careful not to damage to the wheel cap (A) when removing the it...
 Rear Lower Arm Repair procedures
Removal 1. Raise the vehicle, and make sure it is securely supported. 2. Remove the wheel cap (A). Be careful not to damage to the wheel cap (A) when removing the it...
Categories
- Manuals Home
- Hyundai Sonata Owners Manual
- Hyundai Sonata Service Manual
- Cooling System
- Components and Components Location
- Engine Electrical System
- New on site
- Most important about car

Copyright В© 2026 www.hsonatalf.org