
Hyundai Sonata LF: Body Electrical System / Fuel Filler Door
Components and Components Location
| Component Location |
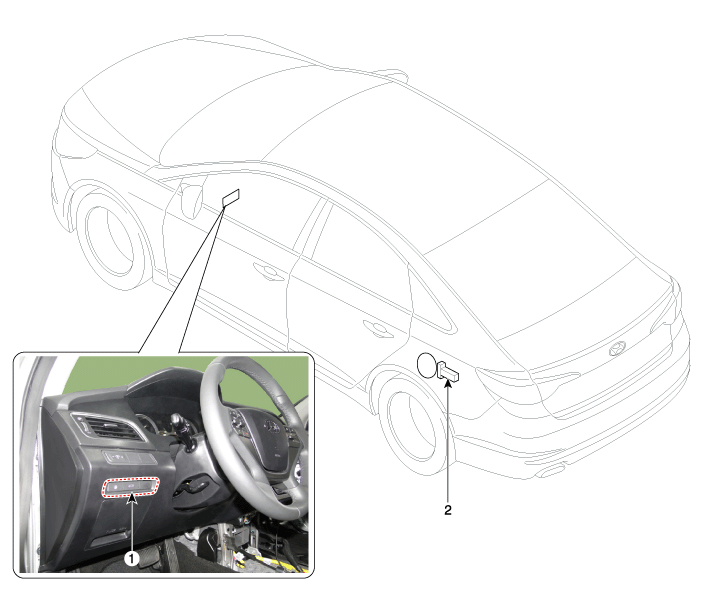
| 1. Fuel filler door open switch | 2. Fuel filler door release actuator |
Fuel Filler Door Release Actuator Repair procedures
| Inspection |
| 1. |
Remove the left luggage side trim.
(Refer to Body - "Trunk Trim") |
| 2. |
Loosen the fuel filler actuator mounting bolts (2EA).
|
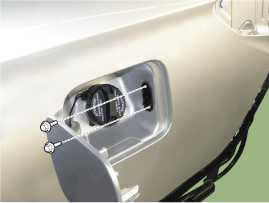
| 3. |
Remove the fuel filler door release actuator (B) after disconnecting the fuel filler door release actuator connector (A).
|
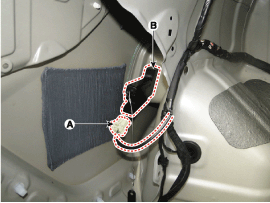
| 4. |
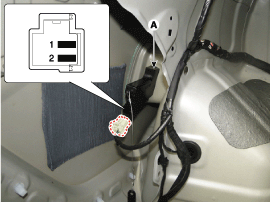
Check for continuity between terminal No. 1 and No. 2. If
there is no continuity, replace the fuel filler door release actuator
(A).
|
Fuel Filler Door Open Switch Components and Components Location
| Components |
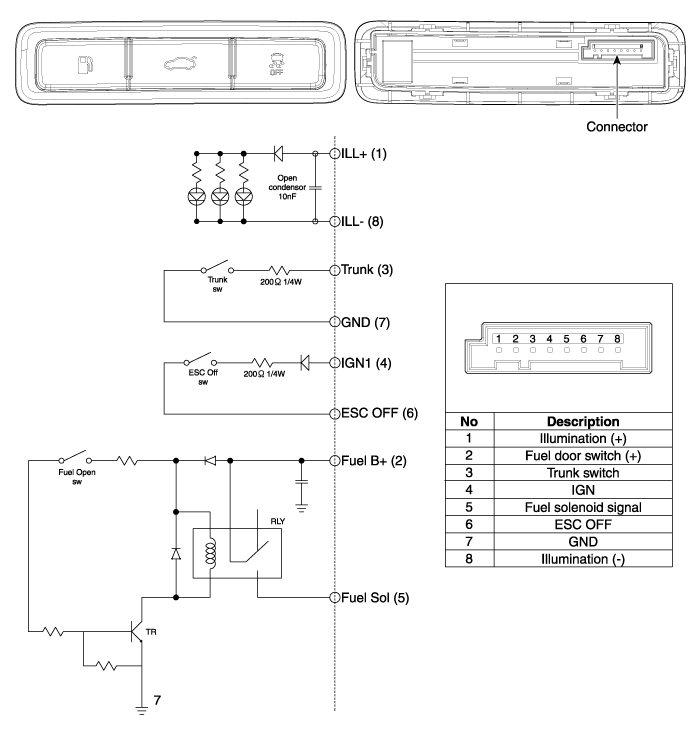
Fuel Filler Door Open Switch Repair procedures
| Inspection |
| 1. |
Disconnect the negative (-) battery terminal. |
| 2. |
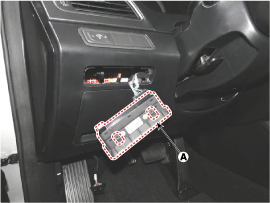
Using a screwdriver or remover, remove the fuel filler door open switch (A).
|

| 3. |
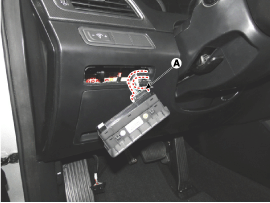
Disconnect the fuel filler door open switch connector (A).
|
| 4. |
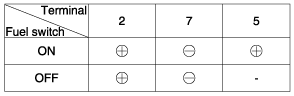
Apply battery voltage to each terminal No.2 (+) and No.7 (-)
as shown in the table. check for continuity between the terminal No 2
and No 5.
If the operation is abnormal, replace the switch assembly.
|
 Lumber Support Units Repair procedures
Removal 1. Disconnect the negative (-) battery terminal. 2. Remove the front seat assembly. (Refer to Body - "Front Seat Assembly") 3. Remove the seat back...

Other information:
Hyundai Sonata LF 2014-2019 Service Manual: AVN(Audio Video Navigation) head unit Repair procedures
Removal • Take care not to scratch the cluster fascia panel and related parts. • Eject all the disc before removing the AVN head unit to prevent damaging the DVD player's load mechanism. • Wrap the protective tape on the tool to disassemble with the screwdriver or remover...
Hyundai Sonata LF 2014-2019 Service Manual: Rheostat Repair procedures
Inspection 1. Disconnect the negative (-) battery terminal. 2. Remove the crash pad lower panel. (Refer to Body - "Crash Pad Lower Panel") 3. Remove the lower crash pad switch assembly (A) after disengaging the mounting clip. 4. Remove the rheostat switch connector (A)...
Categories
- Manuals Home
- Hyundai Sonata Owners Manual
- Hyundai Sonata Service Manual
- Heating, Ventilation and Air Conditioning
- Cylinder Head Cover Repair procedures
- Body Electrical System
- New on site
- Most important about car
