Hyundai Sonata LF: Body Electrical System / Fuel Filler Door
Hyundai Sonata LF 2014-2019 Service Manual / Body Electrical System / Fuel Filler Door
Components and Components Location
| Component Location |
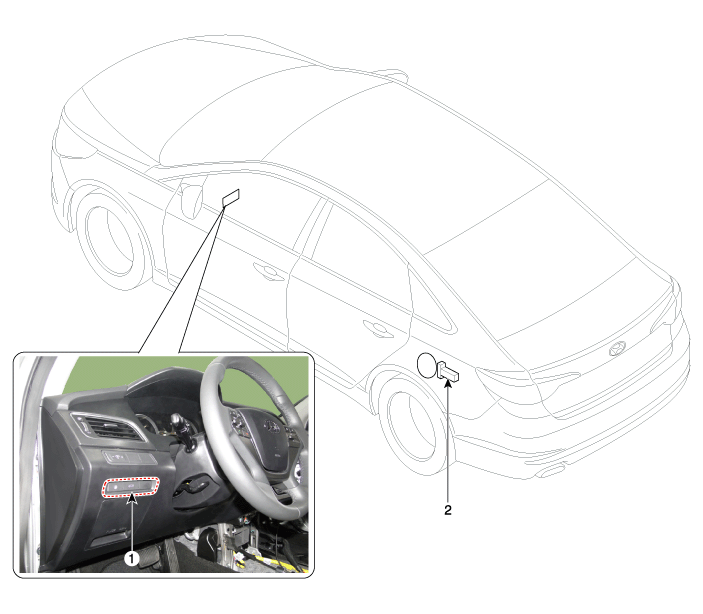
| 1. Fuel filler door open switch | 2. Fuel filler door release actuator |
Fuel Filler Door Release Actuator Repair procedures
| Inspection |
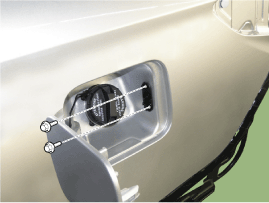
| 1. |
Remove the left luggage side trim.
(Refer to Body - "Trunk Trim") |
| 2. |
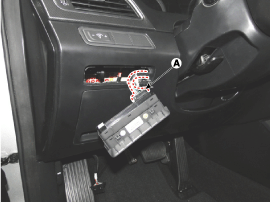
Loosen the fuel filler actuator mounting bolts (2EA).
|
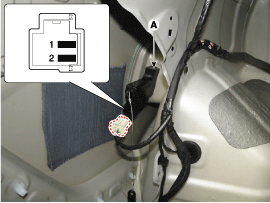
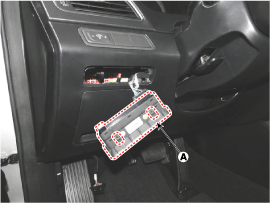
| 3. |
Remove the fuel filler door release actuator (B) after disconnecting the fuel filler door release actuator connector (A).
|
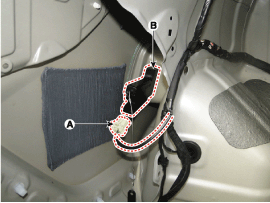
| 4. |
Check for continuity between terminal No. 1 and No. 2. If
there is no continuity, replace the fuel filler door release actuator
(A).
|
Fuel Filler Door Open Switch Components and Components Location
| Components |

Fuel Filler Door Open Switch Repair procedures
| Inspection |
| 1. |
Disconnect the negative (-) battery terminal. |
| 2. |
Using a screwdriver or remover, remove the fuel filler door open switch (A).
|

| 3. |
Disconnect the fuel filler door open switch connector (A).
|
| 4. |
Apply battery voltage to each terminal No.2 (+) and No.7 (-)
as shown in the table. check for continuity between the terminal No 2
and No 5.
If the operation is abnormal, replace the switch assembly.
|

 Lumber Support Units Repair procedures
Removal 1. Disconnect the negative (-) battery terminal. 2. Remove the front seat assembly. (Refer to Body - "Front Seat Assembly") 3. Remove the seat back...

Other information:
Hyundai Sonata LF 2014-2019 Service Manual: Front Door Outside Handle Repair procedures
Replacement 1. Remove the hole plug (B). 2. After loosening the mounting bolt, then remove the front door lock (A). Tightening torque : 6.9 ~ 10.8 N.m (0.7 ~ 1.1 kgf.m, 5.1 ~ 8.0 lb-ft) 3. Remove the front door outside handle (A) by sliding it rearward...
Hyundai Sonata LF 2014-2019 Service Manual: Input shaft speed sensor 1 Components and Components Location
C..
Categories
- Manuals Home
- Hyundai Sonata Owners Manual
- Hyundai Sonata Service Manual
- DCT (Dual Clutch Transmission) System
- Body (Interior and Exterior)
- Engine Control / Fuel System
- New on site
- Most important about car

Copyright © 2026 www.hsonatalf.org