Hyundai Sonata: Brake System / Brake Pedal Repair procedures
Hyundai Sonata LF 2014-2019 Service Manual / Brake System / Brake System / Brake Pedal Repair procedures
| Removal |
| 1. |
Turn ignition switch OFF and disconnect the negative (-) battery cable. |
| 2. |
Remove the crash pad lower panel.
(Refer to Body - "Crash Pad") |
| 3. |
Remove the knee air bag.
(Refer to Restraint - "Knee Airbag(KAB) Module") |
| 4. |
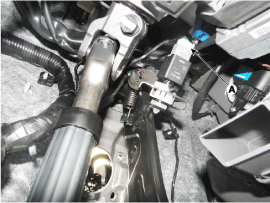
Disconnect the stop lamp switch connector (A), and than remove stop lamp switch.
|
| 5. |
Pull down steering column shaft after removing bolts and nuts
(Refer to - "Steering System - "Steering Column and Shaft") |
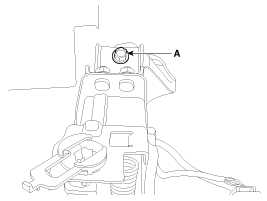
| 6. |
Remove the brake pedal member mounting nut (A).
|
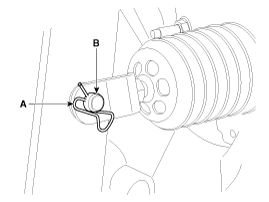
| 7. |
Remove the snap pin (A) and clevis pin (B).
|
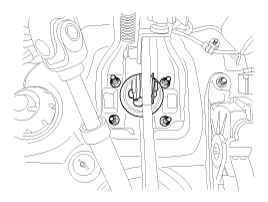
| 8. |
Remove the brake pedal member assembly mounting nuts and then remove the brake pedal assembly.
|
| Inspection |
| 1. |
Check the bushing for wear. |
| 2. |
Check the brake pedal for bending or twisting. |
| 3. |
Check the brake pedal return spring for damage. |
| Installation |
| 1. |
Installation is the reverse of removal.
|

| 2. |
Adjust the brake pedal height and free play. |
| 3. |
Check the brake pedal operation. |
 Brake Pedal Components and Components Location
Components
1. Brake member assembly2. Stop lamp switch3. Bolt4. Return spring5. Brake pedal assembly6. Locking plate
...
 Front Disc Brake Components and Components Location
Components
1. Guide rod bolt2. Bleed screw3. Caliper bracket 4. Caliper body5. Inner pad shim6. Brake pad7. Pad retainer
...
Other information:
Hyundai Sonata LF 2014-2019 Service Manual: Steering Gear box Components and Components Location
Components
[C-MDPS]
1. Steering gear box2. Stabilizer bar3. Sub frame4. Bellows5. Tie rod end6. Heat protect
[R-MDPS]
1. Steering gaer box2. Stabilizer bar3. Sub frame4. Bellows5. Tie rod end6. Heat protect7. Motor8. ECU
...
Hyundai Sonata LF 2014-2019 Owners Manual: Checking the tire inflation pressure
1. After driving approximately 7~10 km (4~6 miles or about 10 min), stop at a
safety location.
2. Connect the filling hose (3) of the compressor directly to the tire valve.
3. Plug the compressor power cord into the vehicle power outlet.
4. Adjust the tire inflation pressure to the recomended tir ...
© 2018-2025 www.hsonatalf.org
