Hyundai Sonata LF: Body (Interior and Exterior) / Roof Trim
Components and Components Location
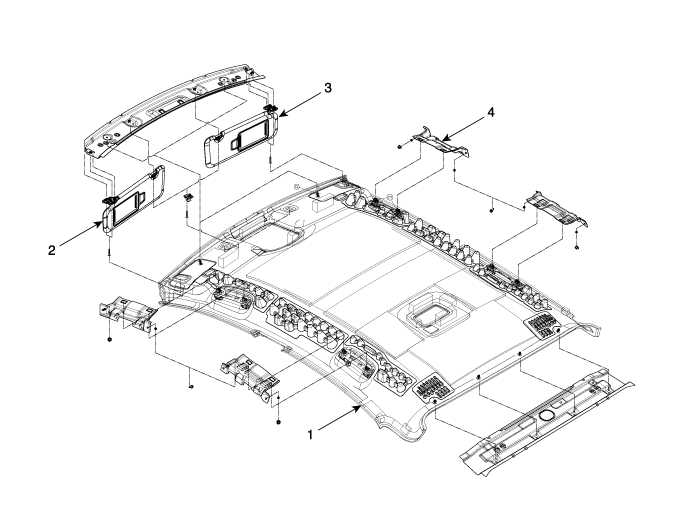
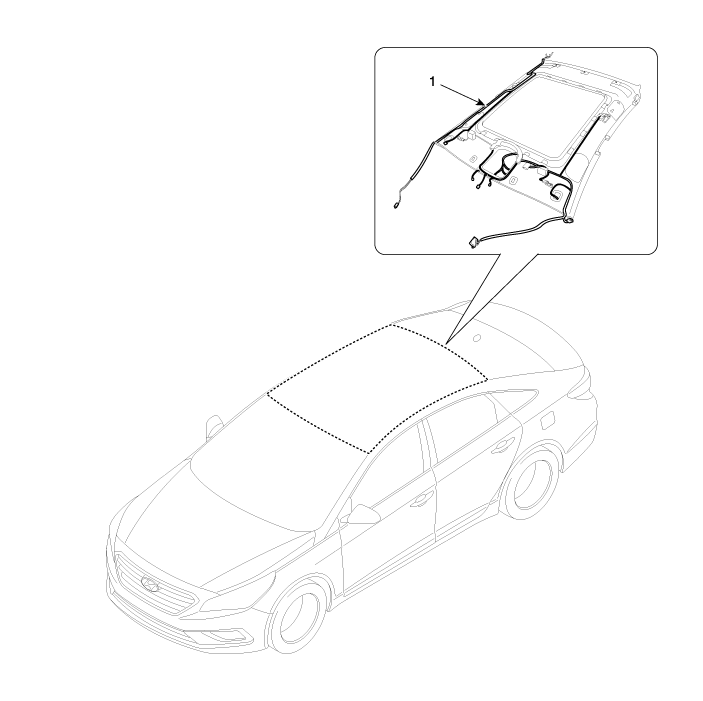
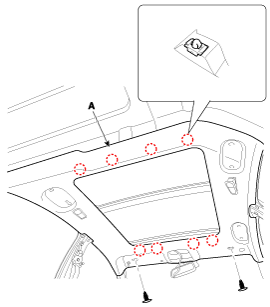
1. Roof trim
2. Sunvisor [LH]
| 3. Sunvisor [RH]
4. Assist handle bracket
|
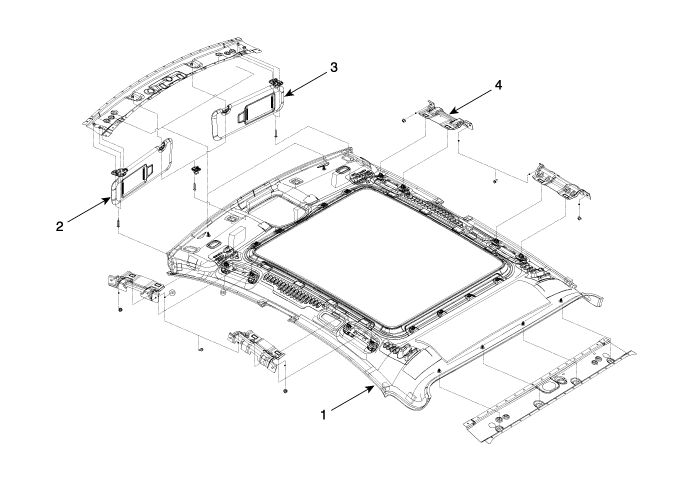
1. Roof trim
2. Sunvisor [LH]
| 3. Sunvisor [RH]
4. Assist handle bracket
|
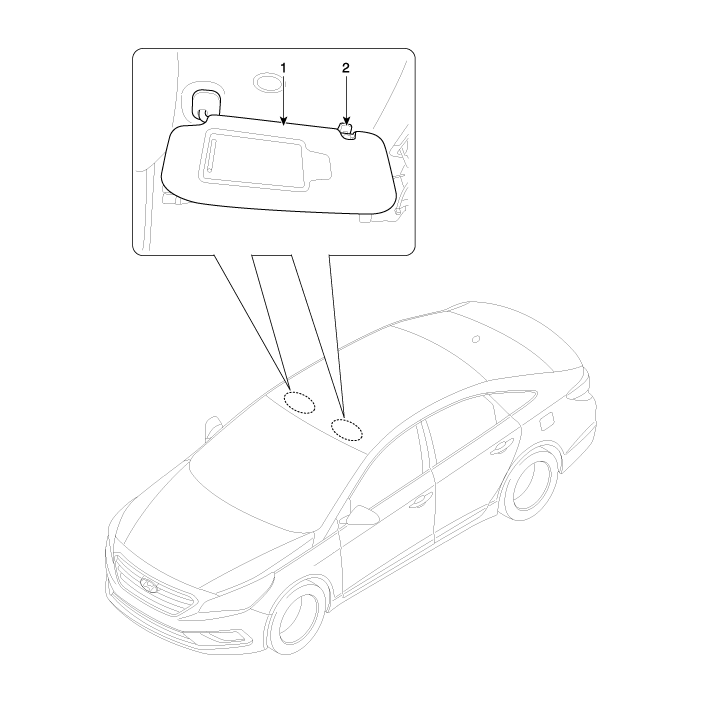
Sunvisor Components and Components Location
Sunvisor Repair procedures
| • |
When prying with a flat-tip screwdriver, wrap it with
protective tape, and apply protective tape around the related parts, to
prevent damage. |
| • |
Use a plastic panel removal tool to remove interior trim pieces to protect from marring the surface. |
| • |
Take care not to bend or scratch the trim and panels. |
|
| 1. |
Loosen the mounting screws, then remove the sunvisor (A) and retainer (B). 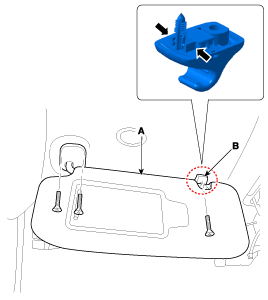
|
| 2. |
Disconnect the sunvisor lamp connector (A). 
|
| 3. |
Install in the reverse order of removal.
| • |
Make sure the connector is connected properly. |
|
|
Assist Handle Components and Components Location

Assist Handle Repair procedures
| • |
Put on gloves to protect your hands. |
|
| • |
When prying with a flat-tip screwdriver, wrap it with
protective tape, and apply protective tape around the related parts, to
prevent damage. |
| • |
Use a plastic panel removal tool to remove interior trim pieces to protect from marring the surface. |
| • |
Take care not to bend or scratch the trim and panels. |
|
| 1. |
Remove the caps (A) and screws, then remove the assist handle (B). 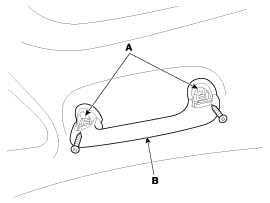
|
| 2. |
Install in the reverse order of removal. |
Roof Trim Assembly Components and Components Location
Roof Trim Assembly Repair procedures
| • |
Put on gloves to protect your hands. |
|
| • |
When prying with a flat-tip screwdriver, wrap it with
protective tape, and apply protective tape around the related parts, to
prevent damage. |
| • |
Use a plastic panel removal tool to remove interior trim pieces to protect from marring the surface. |
| • |
Take care not to bend or scratch the trim and panels. |
|
| 1. |
Remove the front seat.
(Refer to Front Seat - "Front Seat Assembly") |
| 2. |
Remove the rear seat.
(Refer to Rear Seat - "Rear Seat Assembly") |
| 3. |
Remove the front pillar trim.
(Refer to Interior Trim - "Front Pillar Trim") |
| 4. |
Remove the canter pillar upper trim.
(Refer to Interior Trim - "Center Pillar Trim") |
| 5. |
Remove the rear pillar trim.
(Refer to Interior Trim - "Rear Pillar Trim") |
| 6. |
Remove the sub sunvisor.
(Refer to Roof Trim - "Sunvisor") |
| 7. |
Remove the sunvisor and retainer.
(Refer to Roof Trim - "Sunvisor") |
| 8. |
Remove the assist handle.
(Refer to Roof Trim - "Assist Handle") |
| 9. |
Remove the overhead console lamp.
(Refer to Body Electrical System - "Overhead Console Lamp") |
| 10. |
Remove the room lamp.
(Refer to Body Electrical System - "Room Lamp") |
| 11. |
Disconnect the ECM mirror connector.
(Refer to Body Electrical System - "Electro Chromic Inside Rear View Mirror") |
| 12. |
Disconnect the rain sensor.
(Refer to Body Electrical System - "Rain Sensor") |
| 13. |
Disconnect the roof trim main connectors (A) and the mounting clips in the front pillar.
[Driver's] 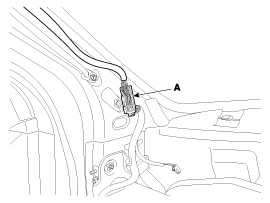
[Passenger's] 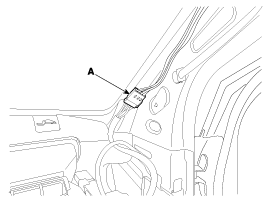
|
| 14. |
Disconnect the connectors (A) and the mounting clips in the rear pillar [RH]. 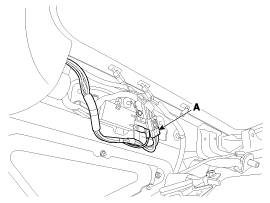
|
| 15. |
Remove the roof trim mounting clip and remove the roof trim assembly (A).
|
Be careful not to wrinkle on the roof trim. |
|
| 16. |
Disconnect the roof trim main connector (A). 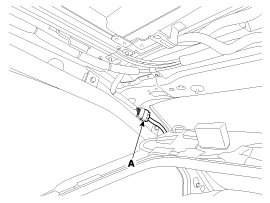
|
| 17. |
Remove the roof trim assembly (A) from the body panel and then carry it out of the vehicle through the rear door. 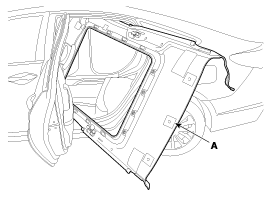
|
| 18. |
Remove the vanity lamp.
(Refer to Body Electrical System - "Vanity Lamp") |
| 19. |
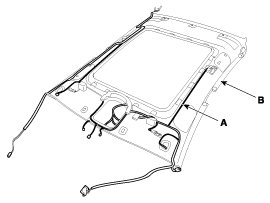
Remove roof trim wiring harness (A) from the roof trim (B).
| • |
Take care not to damage the roof trim wiring harness (A) when removing. |
|
| 1. |
Apply the hot melt continuously when installing the roof trim
wiring harness (A) on the roof trim (B) using the hot melt gun tool. |
| 2. |
Put anti-noise pad on roof trim (B) to prevent the noise. |
|
|
| 20. |
Install in the reverse order of removal.
| • |
Make sure the connector is plugged in properly. |
| • |
Replace any damaged clips. |
|
|
Replacement
•
Put on gloves to protect your hands.
•
When prying with a flat-tip screwdriver or use a prying trim
tool, wrap it with protective tape, and apply protective tape around the
related parts, to prevent damage...
Other information:
Inspection
1.
Disconnect the negative (-) battery terminal.
2.
Pull out the relay from the engine compartment relay block.
Power Relay (Type A)
Check for continuity between the terminals.
1)
Start relay
2)
Deicer relay
3)
Head lamp (high) relay
4)
Blower relay
5)
Power outlet relay
6)
E-CVVT relay
1...
Removal
Engine removal is not required for this procedure.
•
Use fender covers to avoid damaging painted surfaces.
•
To avoid damaging the cylinder head, wait until the engine
coolant temperature drops below normal temperature before removing it...


 Cowl Cross Bar Assembly Repair procedures
