Hyundai Sonata: Crash Pad / Cowl Cross Bar Assembly Repair procedures
| Replacement |
|

|

| 1. |
Disconnect the negative (-) battery terminal. |
| 2. |
Recover the refrigerant with a recovery/recycling/charging station. |
| 3. |
When the engine is cool, drain the engine coolant from the radiator.
(Refer to Engine Mechanical System - “Coolant”) |
| 4. |
Remove the cowl top cover.
(Refer to "Cowl Top Cover") |
| 5. |
Disconnect the expansion valve from the evaporator core.
(Refer to Heating,Ventilation And Air Conditioning - "Heater Unit") |
| 6. |
Disconnect the inlet and outlet heater hoses from the heater unit.
(Refer to Heating,Ventilation And Air Conditioning - "Heater Unit") |
| 7. |
Loosen the cowl cross member mounting bolts.
|

| 8. |
Remove both sides of front seat assembly.
(Refer to Front Seat - "Front Seat Assembly") |
| 9. |
Remove the main crash pad assembly.
(Refer to Crash Pad - "Main Crash Pad Assembly") |
| 10. |
Disconnect the steering column connectors.
(Refer to Steering System - "Steering Column and Shaft") |
| 11. |
Down the steering column after loosening the mounting bolts.
(Refer to Steering System - "Steering Column and Shaft") |
| 12. |
Remove the shift lever assembly.
(Refer to Automatic Transaxle System - "Shift lever") |
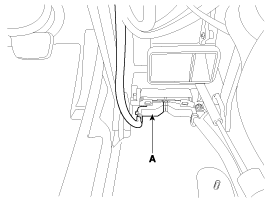
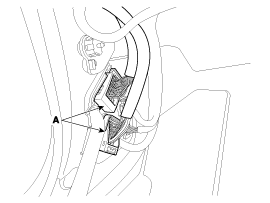
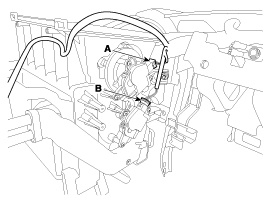
| 13. |
Disconnect the airbag control module (SRSCM) connector (A).
|
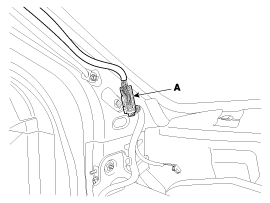
| 14. |
Disconnect the connector (A) and the mounting clips in the front pillar.
[Driver's]
[Passenger's]
|
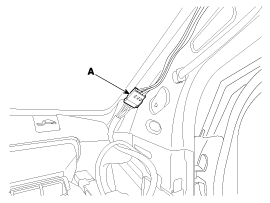
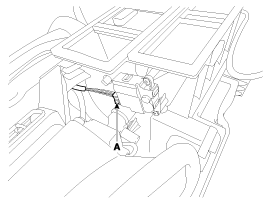
| 15. |
Disconnect the passenger compartment junction box connectors (A).
|
| 16. |
Disconnect the multi box connectors (A).
[Driver's]
[Passenger's]
|

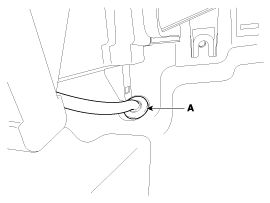
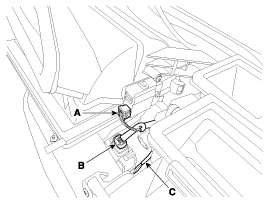
| 17. |
Remove the drain hose (A).
|
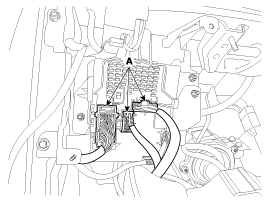
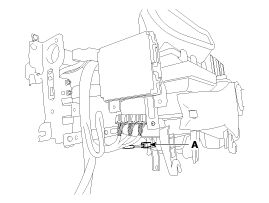
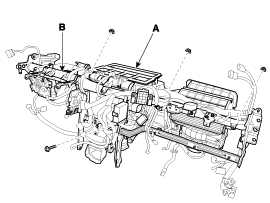
| 18. |
After loosening the nuts and bolts remove the cowl cross bar and heater & blower unit (A) together.
|
| 19. |
Disconnect the heater & blower unit connectors.
|
| 20. |
Remove the heater and blower unit (A) from the cowl cross bar (B) after loosening the mounting nuts.
|
| 21. |
Install in the reverse order of removal.
|

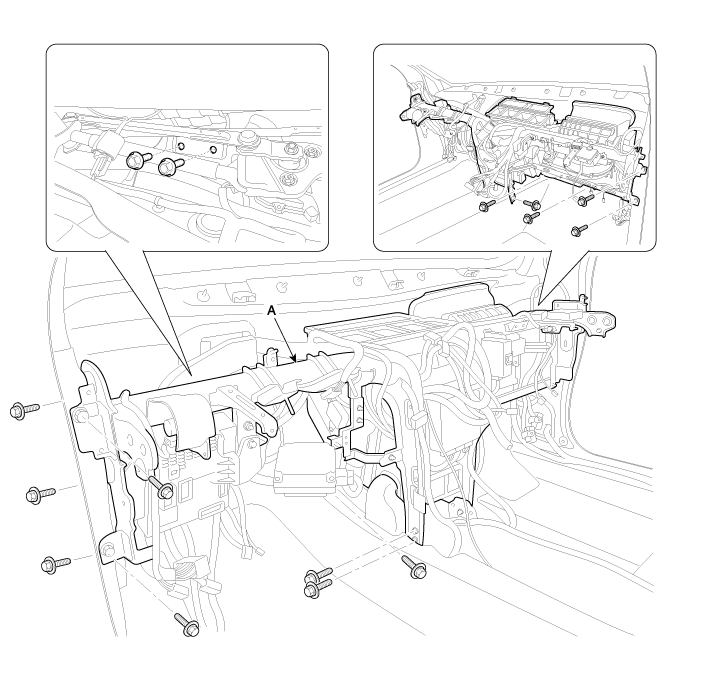
 Cowl Cross Bar Assembly Components and Components Location
Component Location
1. Cowl cross bar assembly
...
 Roof Trim
...
Other information:
Hyundai Sonata LF 2014-2019 Owners Manual: Rear Seat Belt – Passenger’s 3- point system with convertible locking retractor
This type of seat belt combines the features of both an emergency locking retractor
seat belt and an automatic locking retractor seat belt. Convertible retractor type
seat belts are installed in the rear seat positions to help accommodate the installation
of child restraint systems. Although a co ...
Hyundai Sonata LF 2014-2019 Service Manual: Rear Glass Repair procedures
Removal
•
In order to remove the rear glass, use the tools shown in the following figure:
[Tooling Diagram]
Square wire
Insert-type wire grip
[Tooling Assembly Diagram]
•
Insert and affix square wire into the insert hole of the wire grip .
1.
Remov ...
