
Hyundai Sonata LF: Crash Pad / Steering Column Shroud Panel Repair procedures
Hyundai Sonata LF 2014-2019 Service Manual / Body (Interior and Exterior) / Crash Pad / Steering Column Shroud Panel Repair procedures
| Replacement |
[Steering Column Shroud Upper Panel]
|

|

| 1. |
Lower the steering wheel. |
| 2. |
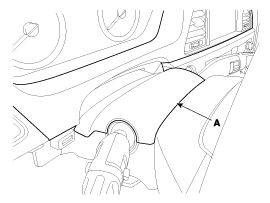
Using a screwdriver or remover, remove the steering column shroud upper panel (A).
|
| 3. |
Install in the reverse order of removal.
|

[Steering column shroud lower panel]
|
|
| 1. |
Remove the crash pad lower panel.
(Refer to Crash Pad - "Crash Pad Lower Panel") |
| 2. |
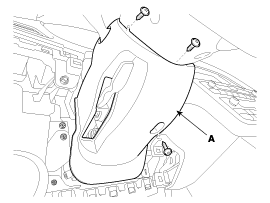
After loosening the mounting screws, then remove the steering column shroud lower panel (A).
|
| 3. |
Install in the reverse order of removal.
|


Categories
- Manuals Home
- Hyundai Sonata Owners Manual
- Hyundai Sonata Service Manual
- Emission Control System
- Cylinder Head Cover Repair procedures
- Engine Control / Fuel System
- New on site
- Most important about car

Copyright © 2026 www.hsonatalf.org