Hyundai Sonata LF: Cooling System / Radiator Repair procedures
| Removal and Installation |
| 1. |
Remove the cooling fan.
(Refer to Cooling System - "Cooling Fan") |
| 2. |
Loosen the drain plug, and drain the coolant. |
| 3. |
Remove the radiator cap to speed draining. |
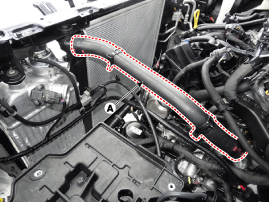
| 4. |
Remove the radiator upper hose (A) and lowr hose (B).
|
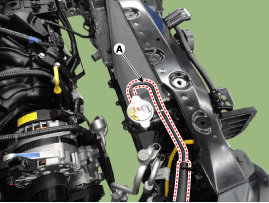
| 5. |
Remove the radiator upper bracket bolts(A).
|
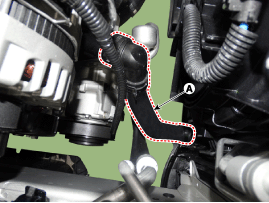
| 6. |
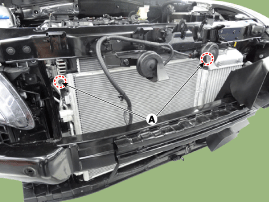
Disconnect the return hose(A).
|
| 7. |
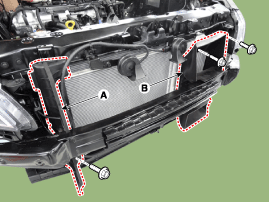
Remove the air guard(A) and intercooler air guard(B).
|
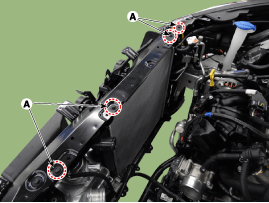
| 8. |
Loosen the radiator mounting bolts(A)
|
| 9. |
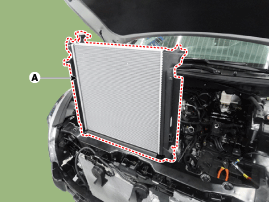
Pull the radiator (A) upward and remove it from engine room.
|
| 10. |
Install in the reverse order of removal.
|

| Inspection |
| 1. |
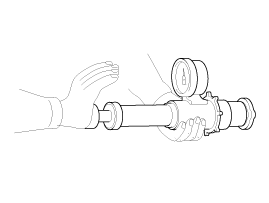
Remove the radiator cap, wet its seal with engine coolant, and then install it on a pressure tester.
|
| 2. |
Apply a pressure of 93.16~122.58kpa (0.95~1.25kg/cm?, 13.51~17.78psi). |
| 3. |
Check for a drop in pressure. |
| 4. |
If the pressure drops, replace the cap. |
| 1. |
Wait until engine is cool, then carefully remove the radiator
cap and fill the radiator with engine coolant, then install a pressure
tester on it.
|

| 2. |
Apply a pressure of 93~123kPa (0.95~1.25kgf/cm?, 14~1
9psi). |
| 3. |
Inspect for engine coolant leaks and a drop in pressure. |
| 4. |
If the pressure drops, check hoses, the radiator and the
water pump for leakage. If there is no leakage, inspect the heater core,
the cylinder block and the cylinder head. |
| 5. |
Remove the tester and reinstall the radiator cap.
|


Other information:
Hyundai Sonata LF 2014-2019 Service Manual: Power Window Switch Repair procedures
Inspection Diagnosis with GDS 1. The body electrocal system can be quickly diagnosed failed parts with vehicle diagnostic system (GDS). The diagnostic system (GDS) provides the following information. (1) Self diagnosis : Checking the failure code (DTC) and display (2) Current data : Checking the system input/output data state (3) Actuation test : Checking the system operation condition (4) Additional function : Other controlling such as he system option and zero point 2...
Hyundai Sonata LF 2014-2019 Service Manual: Water pump Repair procedures
Removal 1. Loosen the drain plug (A), and drain the engine coolant. Remove the radiator cap to drain with speed. System is under high pressure when the engine is hot.To avoid danger of releasing scalding engine coolant, remove the cap only when the engine is cool...
Categories
- Manuals Home
- Hyundai Sonata Owners Manual
- Hyundai Sonata Service Manual
- Audio
- Heating, Ventilation and Air Conditioning
- Cooling System
- New on site
- Most important about car
