Hyundai Sonata LF: Body (Interior and Exterior) / Quarter Fixed Glass
Quarter Fixed Glass Components and Components Location
| Components Location |
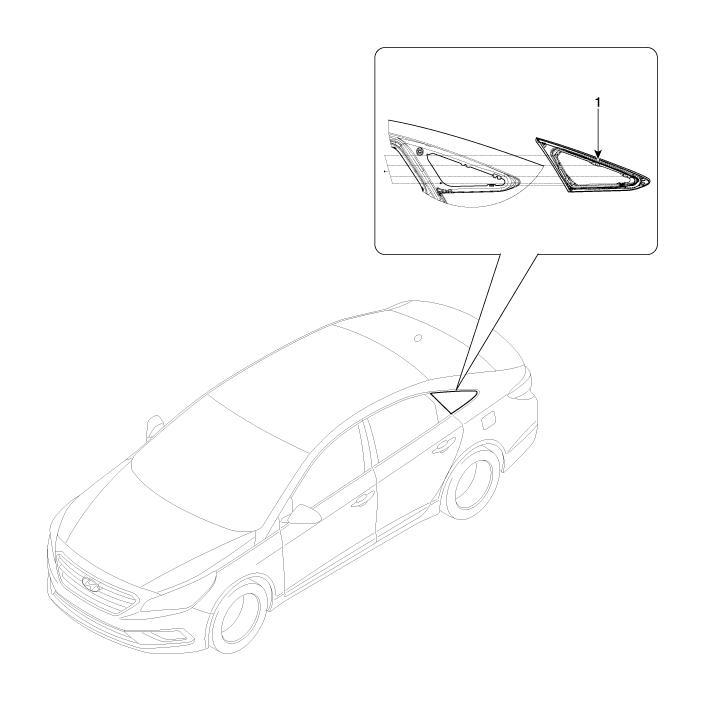
| 1. Quarter fixed glass |
Quarter Fixed Glass Repair procedures
| Removal |
Put on gloves to protect your hands. |

|

| 1. |
Remove the rear pillar trim.
(Refer to Interior Trim - "Rear Pillar Trim") |
| 2. |
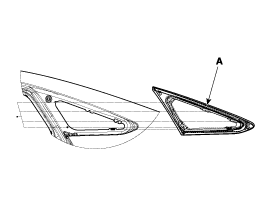
Loosen the quarter fixed glass (A) mounting nuts.
|
| 3. |
Cut out the quarter fixed glass sealant using the utility knife.
|

| Installation |
| 1. |
With a utility knife, scrape the old adhesive smooth to a
thickness of about 2mm (0.08 in.) on the bonding surface around the
entire quarter fixed glass flange.
|
| 2. |
Clean the body bonding surface with a sponge dampened in
alcohol. After cleaning, keep oil, grease and water from getting on the
surface. |
| 3. |
With a sponge, apply a light coat of glass primer along the
edge of the quarter fixed glass as shown, then lightly wipe it off with
gauze or cheese cloth :
|
| 4. |
With a sponge, apply a light coat of body primer to the
original adhesive remaining around the flange. Let the body primer dry
for at least 10 minutes.
|
| 5. |
Pack adhesive into the cartridge without air pockets to
ensure continuous delivery. Put the cartridge in a caulking gun, and run
a bead of sealant around the edge of the quarter fixed glass (A) as
shown. Apply the adhesive within 30 minutes after applying the glass
primer. Make a slightly thicker bead at each corner.
|
| 6. |
Install the quarter fixed glass. |
| 7. |
Let the adhesive dry for at least one hour, then spray water
over the quarter fixed glass and check for leaks. Mark the leaking
areas, let the quarter fixed glass dry, then seal with sealant. Let the
vehicle stand for at least four hours after quarter fix. |
| 8. |
Reinstall all remaining removed parts. |
| 9. |
Install the rear pillar trim. |
 Rear Window Glass
Components and Components Location Components 1. Rear window glass2. Rear glass lower moulding Repair procedures Removal • Put on gloves to protect your hands...
 Floor Carpet. Repair procedures
Repair procedures Replacement • Put on gloves to protect your hands. • When prying with a flat-tip screwdriver or use a prying trim tool, wrap it with protective tape, and apply protective tape around the related parts, to prevent damage...
Other information:
Hyundai Sonata LF 2014-2019 Service Manual: Side Body Body Repair
Side Body A * These dimensions indicated in this figure are actual-measurement dimensions. [ Unit : mm (inch) ] Side Body B * These dimensions indicated in this figure are actual-measurement dimensions. [ Unit : mm (inch) ] Fender apron tooling hole (O7)Fender apron panel tooling hole (O7)Front door upper hinge mounting hole (O13)Front door lower hinge mounting hole (O13)Rear door upper hinge mounting hole (O13)Rear door lower hinge mounting hole (O13)Quarter panel tooling hole (O14)Quarter fixed glass mounting hole (O5...
Hyundai Sonata LF 2014-2019 Service Manual: Water Jacket Seperator Components and Components Location
C..
Categories
- Manuals Home
- Hyundai Sonata Owners Manual
- Hyundai Sonata Service Manual
- Brake System
- Brake System
- Driveshaft and axle
- New on site
- Most important about car
