Hyundai Sonata LF: Panorama Sunroof / Panorama Sunroof Assembly Repair procedures
| Removal |
|


 Square wire
  Insert-type wire grip
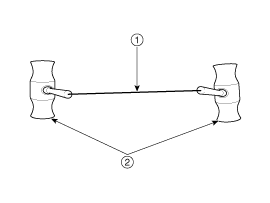
| 1. |
Remove the roof side moulding.
(Refer to Body Side Moulding - "Roof Side Moulding") |
| 2. |
Remove the front glass.
(Refer to Panorama Sunroof - "Front Glass") |
| 3. |
Remove the roof trim.
(Refer to Roof Trim - "Roof Trim Assembly") |
| 4. |
Remove the curtain airbag (CAB) module.
(Refer to Restraint - "Curtain Airbag (CAB) Module") |
| 5. |
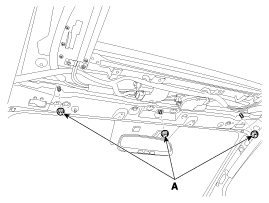
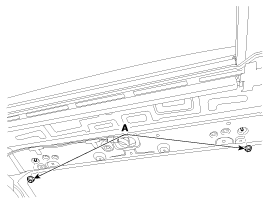
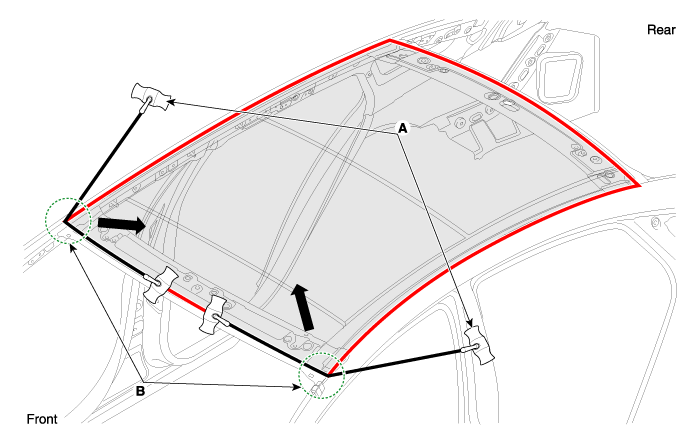
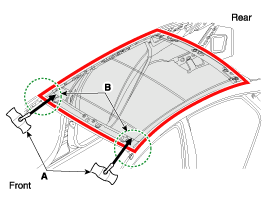
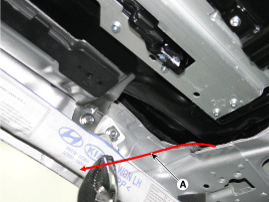
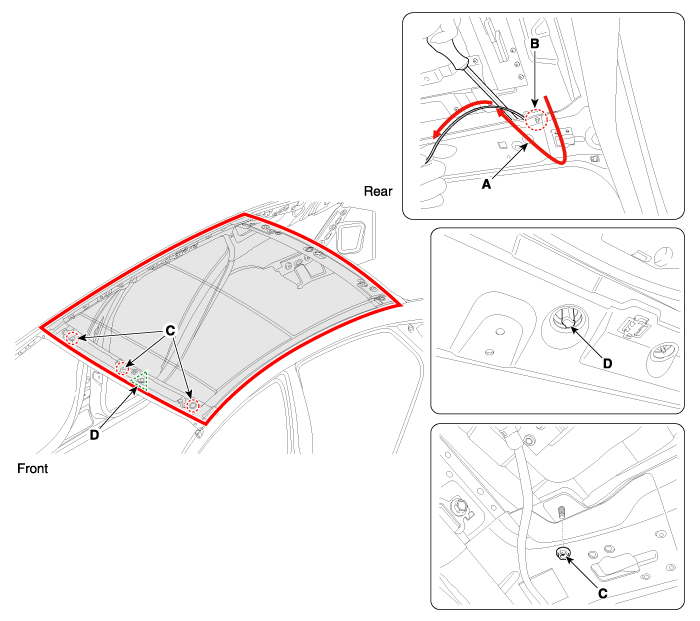
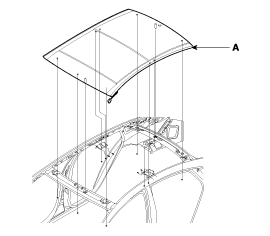
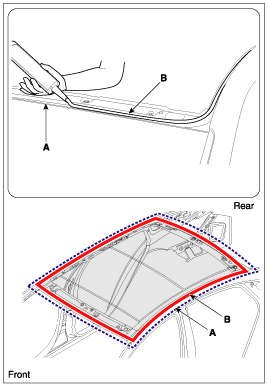
Loosen the panorama sunroof mounting nuts (A).
[Front]
[Rear]
|
| 6. |
Loosen the bolts (A) and nuts (B) on the side of the panorama sunroof.
|
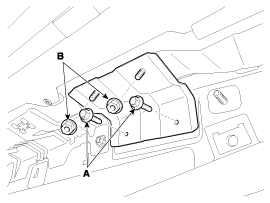
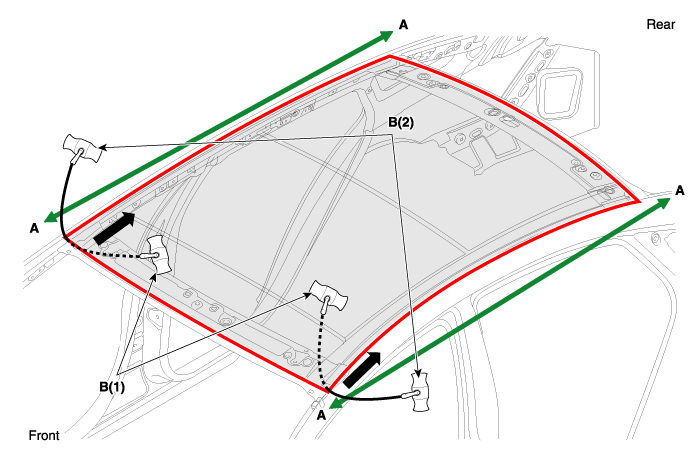
| 7. |
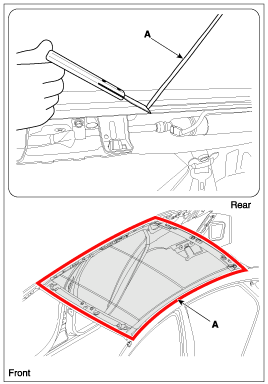
Pull the square wire (A) to the left and right, then apply a
force in the direction of the arrow to cut off the residual sealant on
front edge (B).
|


| 8. |
Push wire (A) from the outside of the body toward the face of edge (B) in the direction of the arrow.
|
| 9. |
When wire lead is visible inside body, pull wire lead (A) toward inside.
|
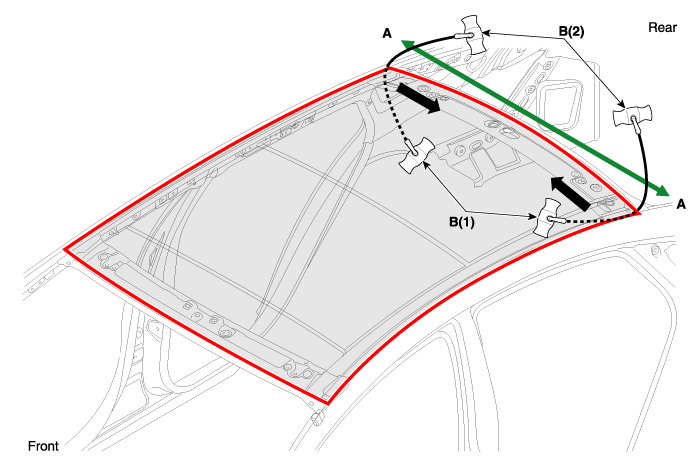
| 10. |
Pull the square wire (B) to the left and right, then apply a
force in the direction of the arrow to cut off the residual sealant on
front section (A-A).
|
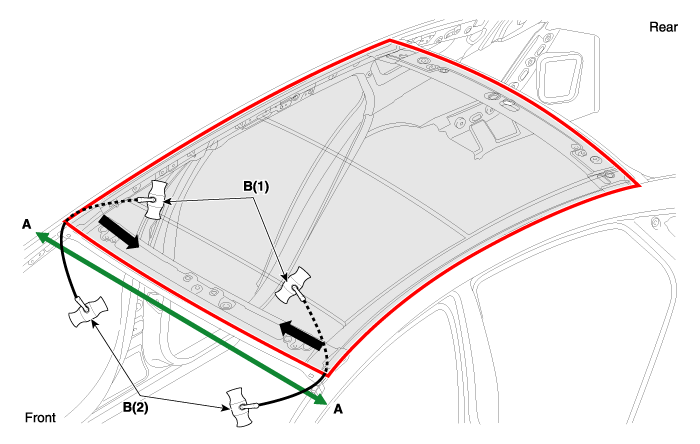
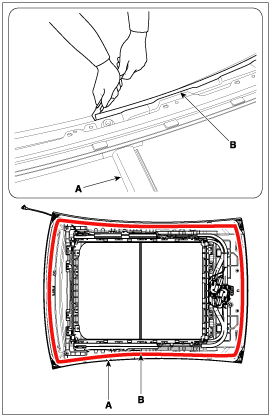
| 11. |
Pull the square wire (B) to the left and right, then apply a
force in the direction of the arrow to cut off the residual sealant on
side section (A-A).
|
| 12. |
Pull the square wire (B) to the left and right, then apply a
force in the direction of the arrow to cut off the residual sealant on
rear section (A-A).
|
| 13. |
Cut residual sealant on every surface, and then remove panorama sunroof assembly (A).
|
| Installation |
|
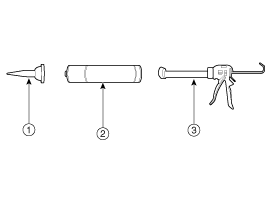
 Sealant gun
| 1. |
Use a blade to cut off residual sealant (A) around body panel.
|
| 2. |
If panorama sunroof assembly (A) is reused, use a blade to remove residual sealant (B) around the body panel.
|
| 3. |
Use alcohol or an air gun to clean up the edges of the body panel and the panorama sunroof. |
| 4. |
Use a sealant gun to apply sealant (B) around body panel (A).
|
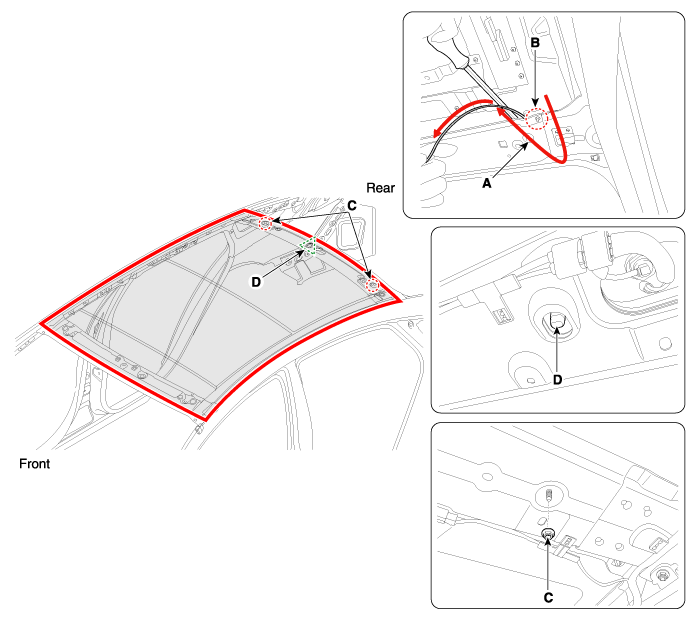
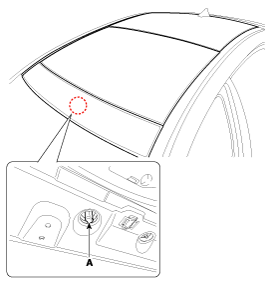
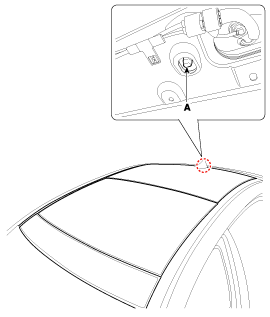
| 5. |
Align with centering device hole (A) of the body, and carefully mount the panorama sunroof on the body panel.
[Front]
[Rear]
|
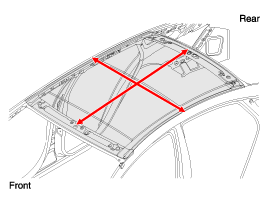
| 6. |
Check step and gap before fully mounting panorama sunroof assembly (A). |
| 7. |
Apply tape to around the panorama sunroof assembly to prevent the assembly from coming off.
|
| 8. |
Tighten panorama sunroof mounting nuts (A).
[Front]
[Rear]
|
| 9. |
Tighten panorama sunroof side mounting bolts (A) and nuts (B).
|
| 10. |
Install the curtain airbag (CAB) module.
(Refer to Restraint - "Curtain Airbag (CAB) Module") |
| 11. |
Perform water leak test.
|
| 12. |
If a water leak occurs, apply sealant to any section where water is leaking.
|
| 13. |
Install the roof trim assembly. |
| 14. |
Install the roof side moulding. |
| 15. |
Install the front glass. |

 Mirror
Outside Rear View Mirror Components and Components Location Component Location 1. Outside rear view mirror Outside Rear View Mirror Repair procedures Replacement • Put on gloves to protect your hands...
Other information:
Hyundai Sonata LF 2014-2019 Service Manual: General Service Information
General Information Protection Of The Vehicle Always be sure to cover fenders, seats, and floor areas before starting work. The support rod must be inserted into the hole near the edge of the hood whenever you inspect the engine compartment to prevent the hood from falling and causing possible injury...
Hyundai Sonata LF 2014-2019 Service Manual: Purge Control Solenoid Valve (PCSV) Repair procedures
Inspection 1. Turn the ignition switch OFF. 2. Disconnect the PCSV connector. 3. Measure resistance between the PCSV terminals 1 and 2. 4. Check that the resistance is within the specification. Specification: Refer to “Specification” Removal 1...
Categories
- Manuals Home
- Hyundai Sonata Owners Manual
- Hyundai Sonata Service Manual
- Cooling System
- Alternator Repair procedures
- Heating, Ventilation and Air Conditioning
- New on site
- Most important about car
