
Hyundai Sonata LF: Fuses And Relays / Relay Box (Engine Compartment) Repair procedures
Hyundai Sonata LF 2014-2019 Service Manual / Body Electrical System / Fuses And Relays / Relay Box (Engine Compartment) Repair procedures
| Inspection |
| 1. |
Disconnect the negative (-) battery terminal. |
| 2. |
Pull out the relay from the engine compartment relay block. |
Power Relay (Type A)
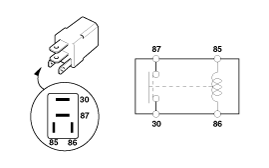
Check for continuity between the terminals.
| 1) |
Start relay |
| 2) |
Deicer relay |
| 3) |
Head lamp (high) relay |
| 4) |
Blower relay |
| 5) |
Power outlet relay |
| 6) |
E-CVVT relay |
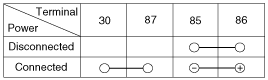
| 1. |
There should be continuity between the No.30 and No.87
terminals when power and ground are connected to the No.85 and No.86
terminals. |
| 2. |
There should be no continuity between the No.30 and No.87 terminals when power is disconnected.
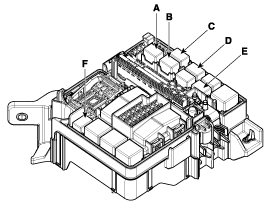
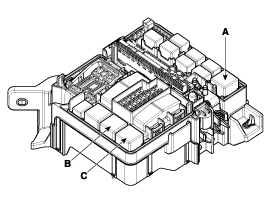
Engine Room Relay Block
|
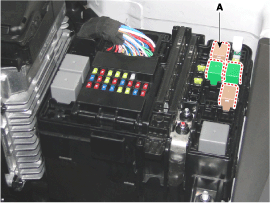
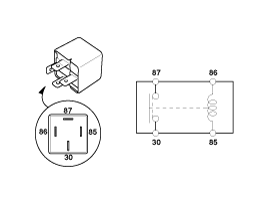
Power Relay (Type B)
Check for continuity between the terminals.
| 1) |
Rear heated relay |
| 2) |
Cooling fan relay |
| 3) |
Cooling fan relay |
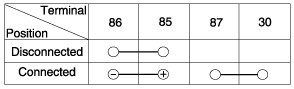
| 1. |
There should be continuity between the No.30 and No.87
terminals when power and ground are connected to the No.85 and No.86
terminals. |
| 2. |
There should be no continuity between the No.30 and No.87 terminals when power is disconnected.
|
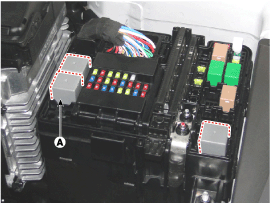
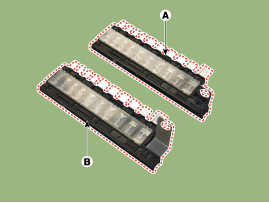
Metal Core PCB Block
| 1. |
Disconnect the negative (-) battery terminal. |
| 2. |
Put up the metal care PCB block (A) after push 4 hooks (B) in the block assembly.
|
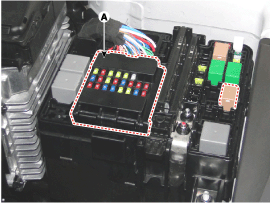
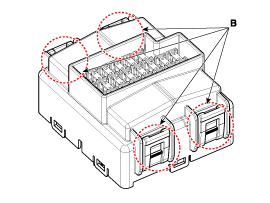
| 3. |
Remove the metal care PCB block after disconnet the connector. |
Fuse
| 1. |
Be sure there is no play in the fuse holders, and that the fuses are held securely. |
| 2. |
Are the fuse capacities for each circuit correct? |
| 3. |
Are there any blown fuses?
|

Multi Fuse
Engine room fuse is to optimize the package.
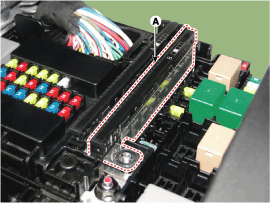
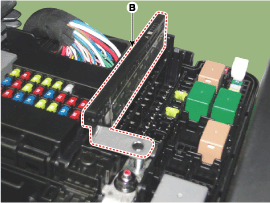
|


Other information:
Hyundai Sonata LF 2014-2019 Service Manual: Rheostat Repair procedures
Inspection 1. Disconnect the negative (-) battery terminal. 2. Remove the crash pad lower panel. (Refer to Body - "Crash Pad Lower Panel") 3. Remove the lower crash pad switch assembly (A) after disengaging the mounting clip. 4. Remove the rheostat switch connector (A)...
Hyundai Sonata LF 2014-2019 Service Manual: Audio Remote Control (Sonata Sports) Schematic Diagrams
C..
Categories
- Manuals Home
- Hyundai Sonata Owners Manual
- Hyundai Sonata Service Manual
- Repair procedures
- Driveshaft and axle
- Heating, Ventilation and Air Conditioning
- New on site
- Most important about car

Copyright В© 2026 www.hsonatalf.org