
Hyundai Sonata LF: Rear Seat / Rear Seat Cushion Cover Repair procedures
| Replacement |
|

|

| 1. |
Remove the rear seat cushion assembly.
(Refer to Rear Seat - "Rear Seat Assembly") |
| 2. |
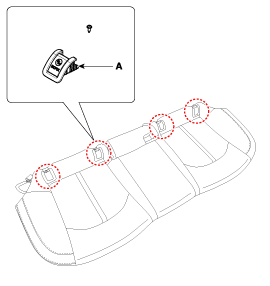
After loosening the mounting screws, then remove the rear isofix bracket (A).
|
| 3. |
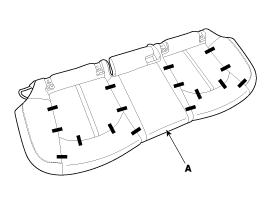
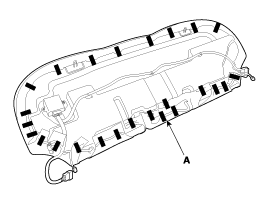
After removing the clips on the rear of seat cushion cover and remove the rear seat cushion cover (A).
[Front side]
[Rear side]
|
| 4. |
Install in the reverse order of removal.
|

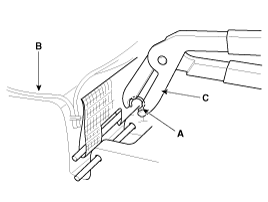

 Rear Back Armrest Repair procedures
Replacement • When prying with a flat-tip screwdriver or use a prying trim tool, wrap it with protective tape, and apply protective tape around the related parts, to prevent damage...
Other information:
Hyundai Sonata LF 2014-2019 Service Manual: Front Axle Assembly
Front Hub - Axle Components and Components Location Components 1. Brake disc2. Hub bearing3. Dust cover4. Knuckle Front Hub - Axle Repair procedures Replacement Front hub assembly 1. Raise the vehicle, and make sure it is securely supported...
Hyundai Sonata LF 2014-2019 Service Manual: Alternator Repair procedures
Removal 1. Disconnect the battery negative terminal. 2. Loosen the mounting bolts (A) and then, turn the adjusting bolt (B) clockwise to loosen tension. 3. Remove the drive belt (A). 4. Disconnect the air compressor connector (A) and the alternator connector (B), and remove the cable from alternator "B" terminal (C)...
Categories
- Manuals Home
- Hyundai Sonata Owners Manual
- Hyundai Sonata Service Manual
- Transmission Gear Oil Repair procedures
- DCT (Dual Clutch Transmission) System
- Cooling System
- New on site
- Most important about car
