Hyundai Sonata LF: Rear Door / Rear Door Trim Repair procedures
Hyundai Sonata LF 2014-2019 Service Manual / Body (Interior and Exterior) / Rear Door / Rear Door Trim Repair procedures
| Replacement |
|

|

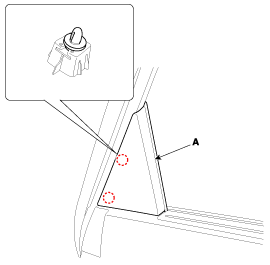
| 1. |
Using a screwdriver or remover, remove the rear door derta inner cover (A).
|
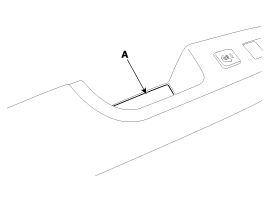
| 2. |
Using a flat-tip or remover, remove the rear door pull cap (A).
|
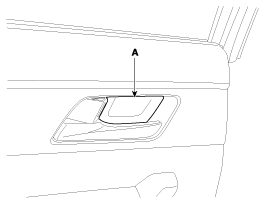
| 3. |
Pull the front door inside handle using a flat head
screwdriver and remove the cap (A) using the hole located inside of the
handle.
|
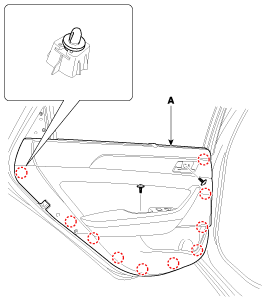
| 4. |
After loosening the mounting screws, then remove the rear door trim (A) by using a flat-tip screwdriver.
|
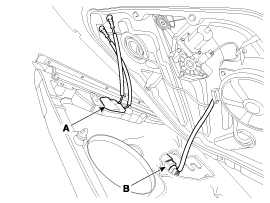
| 5. |
Remove the rear door inside handle cage (A). |
| 6. |
Disconnect the power window switch connector (B).
|
| 7. |
Remove the rear door side curtain assembly.
(Refer to Rear Door - "Rear Door Side Curtain Assembly") |
| 8. |
Install in the reverse order of removal.
|


 Rear Door Inside Handle Repair procedures
Replacement 1. Remove the rear door trim. (Refer to Rear Door - "Rear Door Trim") 2. Remove the rear door side curtain assembly. (Refer to Rear Door - "Rear door side curtain assembly") 3...
Other information:
Hyundai Sonata LF 2014-2019 Service Manual: Rear Coil Spring Repair procedures
Replacement 1. Raise the vehicle, and make sure it is securely supported. 2. Remove the wheel cap (A). Be careful not to damage to the wheel cap (A) when removing the it. 3. Remove the front wheel and tire (A) from front hub...
Hyundai Sonata LF 2014-2019 Service Manual: Engine Cover Repair procedures
R..
Categories
- Manuals Home
- Hyundai Sonata Owners Manual
- Hyundai Sonata Service Manual
- Engine Control System
- Driveshaft and axle
- Body Electrical System
- New on site
- Most important about car

Copyright © 2026 www.hsonatalf.org