Hyundai Sonata LF: ESP(Electronic Stability Program) System / ESP Control Unit Repair procedures
Hyundai Sonata LF 2014-2019 Service Manual / Brake System / ESP(Electronic Stability Program) System / ESP Control Unit Repair procedures
| Removal |
| 1. |
Turn the ignition switch OFF. |
| 2. |
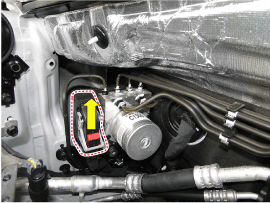
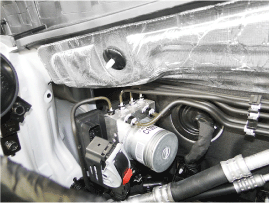
Pull up the lock of the HECU connector , then disconnect the connector.
|
| 3. |
Disconnect the brake tubes from the HECU by unlocking the nuts counterclockwise with a spanner.
|
| 4. |
Loosen the HECU bracket bolts, then remove HECU and bracket.
|

| 5. |
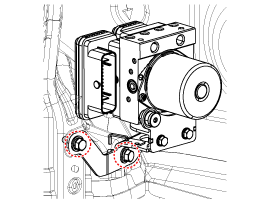
Loosen the bracket bolts, then remove the bracket from HECU.
|
| Installation |
| 1. |
Installation is the reverse of removal. |
| 2. |
Tighten the HECU mounting bolts and nuts to the specified torque. |
| 3. |
After installation, bleed the brake system.
(Refer to Brake System - "ESP SYSTEMBrake System Bleeding") |
| 4. |
Connect the GDS to the data link connector located underneath the dash panel. |
| 5. |
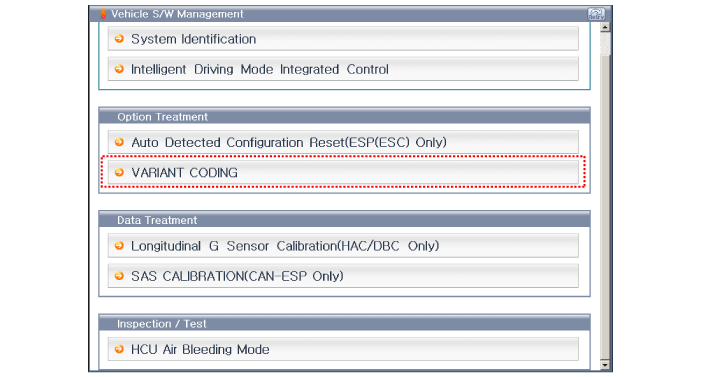
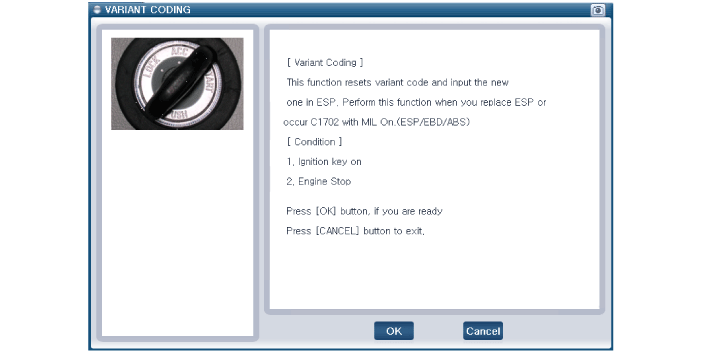
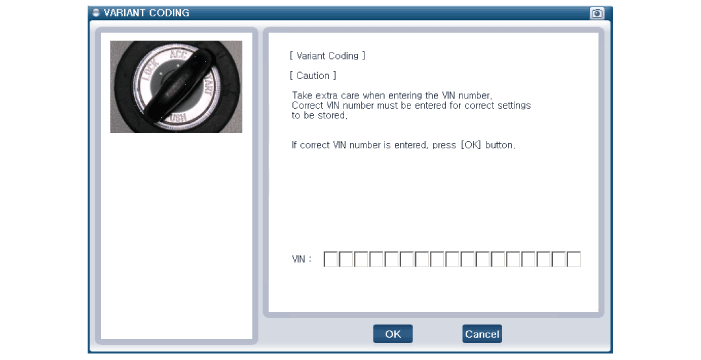
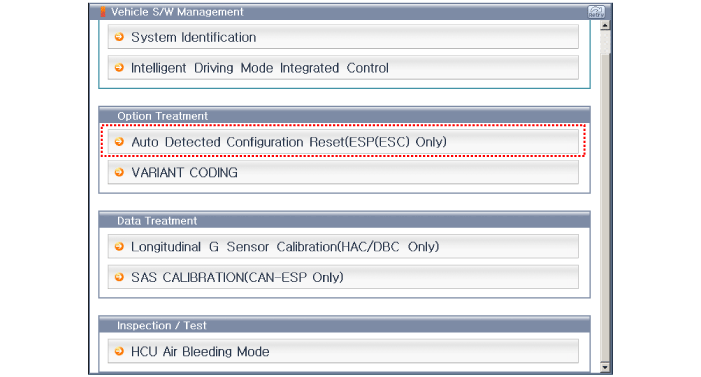
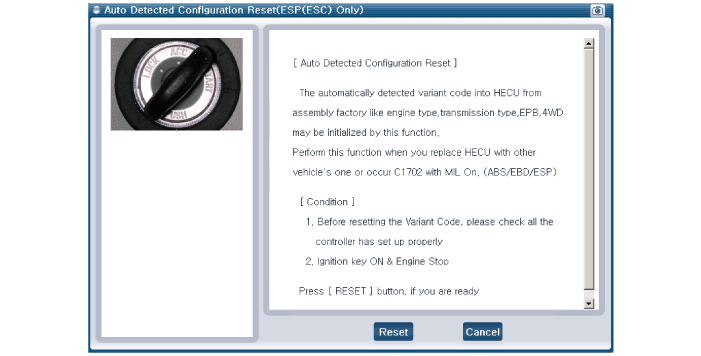
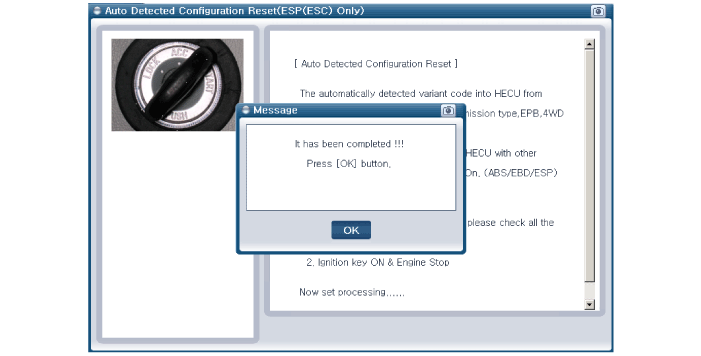
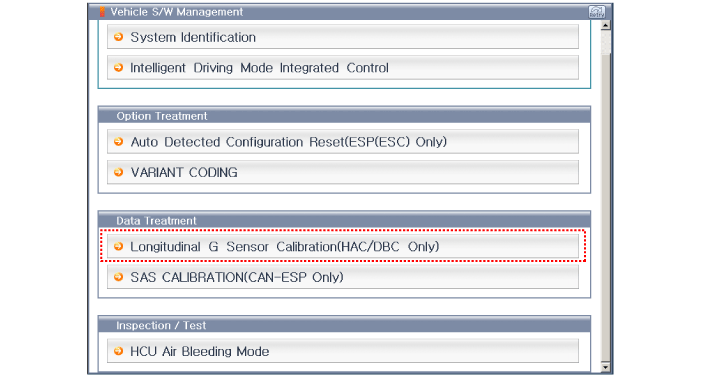
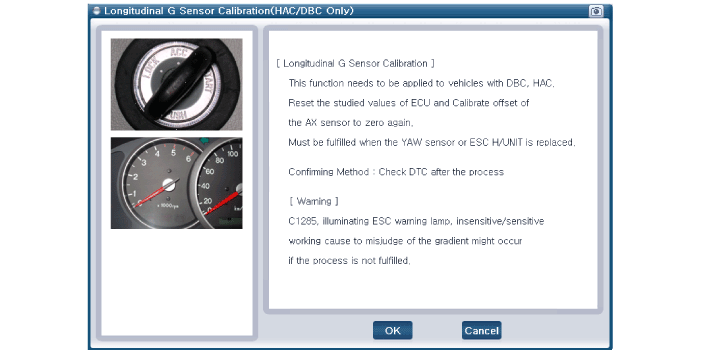
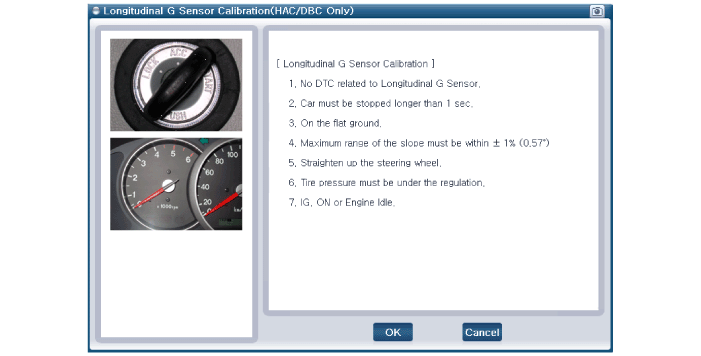
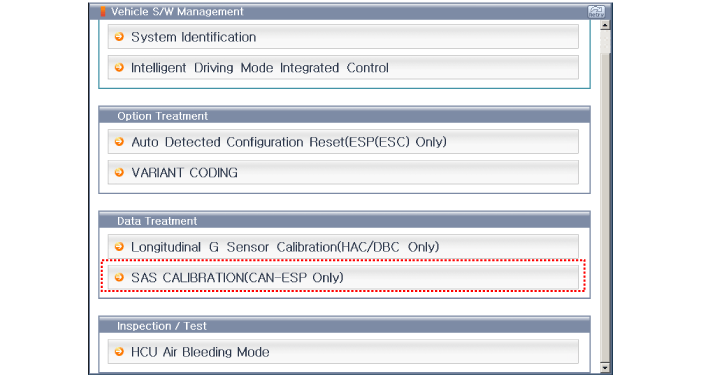
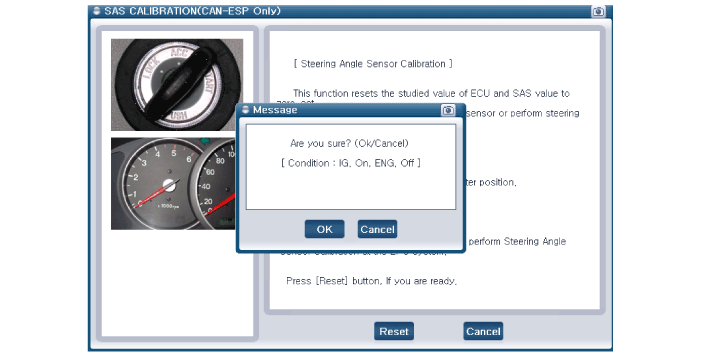
Select and operate according to the instructions on the GDS screen.
[VARIANT CODING]
[Auto Detected Configuration Reset]
[Longitidinal G Sensor Clibration]
[SAS CALIBRATION]
|


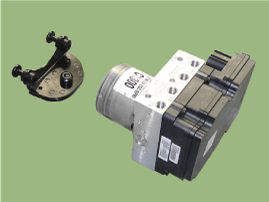
 ESP Control Unit Components and Components Location
Components 1. Front - left tube2. Rear - right tube3. Rear - left tube4. Front - right tube5. MC26. MC17. EPS control module(HECU) connector8. EPS control module(HECU)9...

Other information:
Hyundai Sonata LF 2014-2019 Service Manual: Description and Operation
Description The immobilizer system will disable the vehicle unless the proper ignition key is used, in addition to the currently available anti-theft systems such as car alarms, the immobilizer system aims to drastically reduce the rate of auto theft...
Hyundai Sonata LF 2014-2019 Service Manual: Windshield Glass
Components and Components Location Components 1. Windshield glass 2. Windshield moulding mounting bracket3. Windshield glass side moulding4. Windshield glass upper moulding Repair procedures Removal • Put on gloves to protect your hands...
Categories
- Manuals Home
- Hyundai Sonata Owners Manual
- Hyundai Sonata Service Manual
- Driveshaft and axle
- Engine Mechanical System
- Audio
- New on site
- Most important about car

Copyright © 2026 www.hsonatalf.org