
Hyundai Sonata LF: Airbag Module / Curtain Airbag (CAB) Module Repair procedures
Hyundai Sonata LF 2014-2019 Service Manual / Restraint / Airbag Module / Curtain Airbag (CAB) Module Repair procedures
| Removal |
| 1. |
Disconnect the battery negative cable and wait for at least 3 minutes before beginning work. |
| 2. |
Remove the roof trim.
(Refer to Body - "Roof Trim Assembly") |
| 3. |
Disconnect the curtain airbag harness connector.
|
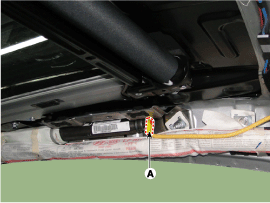
| 4. |
After loosening the mounting bolts and nuts remove the curtain airbag.
|
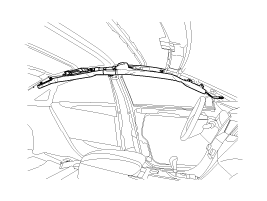
| Installation |
| 1. |
Remove the ignition key from the vehicle. |
| 2. |
Disconnect the battery negative cable and wait for at least three minutes. |
| 3. |
Tighten the curtain airbag mounting bolts and nuts.
|

| 4. |
Connect the curtain airbag connector. |
| 5. |
Install the roof trim.
(Refer to Body - "Roof Trim Assembly") |
| 6. |
Reconnect the battery negative cable. |
| 7. |
After installing the curtain airbag (CAB), confirm proper system operation :
|

 Knee Airbag (KAB) Module Description and Operation
Description The Knee Airbag (KAB) is installed inside the crash pad lower panel and protects the driver in the event of a frontal crash. The SRSCM determines if and when to deploy the KAB...
Other information:
Hyundai Sonata LF 2014-2019 Service Manual: Center Facia Upper Panel Repair procedures
Replacement • Put on gloves to protect your hands. • When prying with a flat-tip screwdriver or use a prying trim tool, wrap it with protective tape, and apply protective tape around the related parts, to prevent damage...
Hyundai Sonata LF 2014-2019 Service Manual: Battery Specifications
S..
Categories
- Manuals Home
- Hyundai Sonata Owners Manual
- Hyundai Sonata Service Manual
- Front Driveshaft Repair procedures
- Engine Control / Fuel System
- DCT (Dual Clutch Transmission) System
- New on site
- Most important about car

Copyright © 2026 www.hsonatalf.org