
Hyundai Sonata LF: Body Dimensions / General Information
| General |
| 1. |
Basically, all measurements in this manual are taken with a tracking gauge. |
| 2. |
When a measuring tape is used, check to be sure there is no elongation, twisting or bending. |
| 3. |
For measuring dimensions, both projected dimension and actual-measurement dimension are used in this manual. |
| 4. |
This measurements are provided as reference for A/S, so it can not be used as specification. |
| Measurement Method |
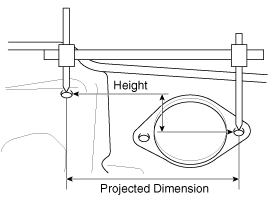
| Projected Dimensions |
| 1. |
These are the dimensions measured when the measurement
points are projected into the reference plane, and are the reference
dimensions used for body alterations. |
| 2. |
If the length of the tracking gauge probes is adjustable,
make the measurement by lengthening one probe by the amount equivalent
to the difference in height of the two surfaces.
|
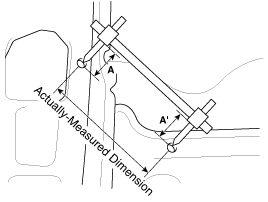
| Actual-Measurement Dimensions |
| 1. |
These dimensions indicate the actual linear distance between
measurement points, and are the reference dimensions for use if a
tracking gauge is used for measurement. |
| 2. |
Measure by first adjusting both probes to the same length (A=A').
|

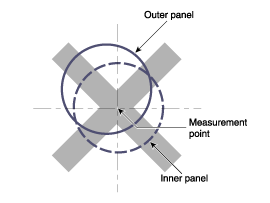
| Measurement Point |
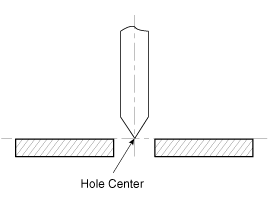
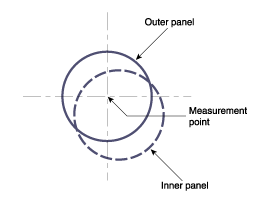
| 1. |
Measurements should be taken at the hole center.
|

 Front Body Body Repair
Front Body A * These dimensions indicated in this figure are actual-measurement dimensions. [ Unit : mm (inch) ] Front Body B * These dimensions indicated in this figure are actual-measurement dimensions...
Other information:
Hyundai Sonata LF 2014-2019 Service Manual: Compressor Description and Operation
Description The compressor is the power unit of the A/C system. It is located on the side of engine block and driven by a V-belt of the engine. The compressor changes low pressure and low temperature refrigerant gas into high pressure and high temperature refrigerant gas...
Hyundai Sonata LF 2014-2019 Service Manual: Troubleshooting
Troubleshooting Trouble symptomProbable causeRemedyDisplayed the warning lamp "E"(Driving is only possible with 1/ R gear)Not performed DCT learningPerform the DCT manual learning procedure.Impossible to driving with odd gearClutch actuator (Clutch motor 1 or position sensor 1 failure)Replace the clutch actuator assembly...
Categories
- Manuals Home
- Hyundai Sonata Owners Manual
- Hyundai Sonata Service Manual
- Suspension System
- Brake System
- Driveshaft and axle
- New on site
- Most important about car
