Hyundai Sonata LF: Body Dimensions / Front Body Body Repair
| Front Body A |
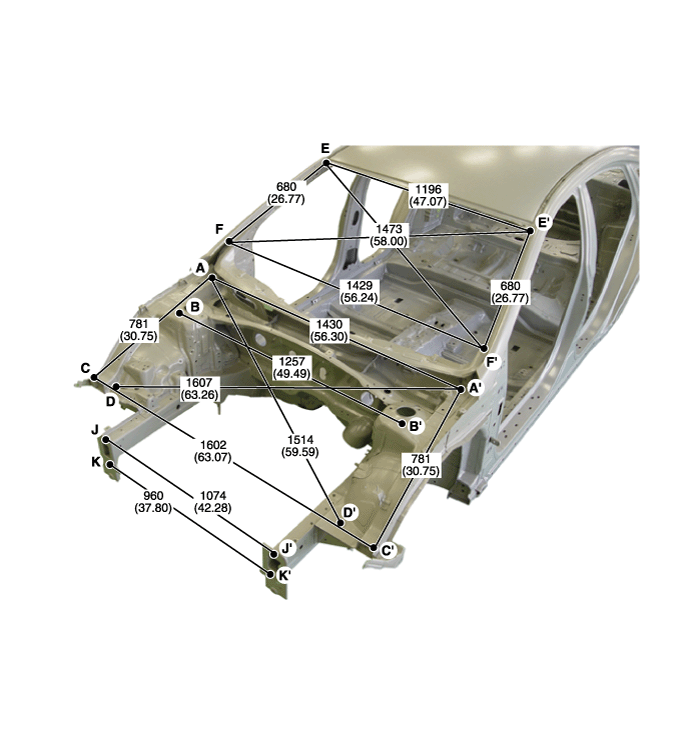
| * These dimensions indicated in this figure are actual-measurement dimensions. [ Unit : mm (inch) ] |
| Front Body B |
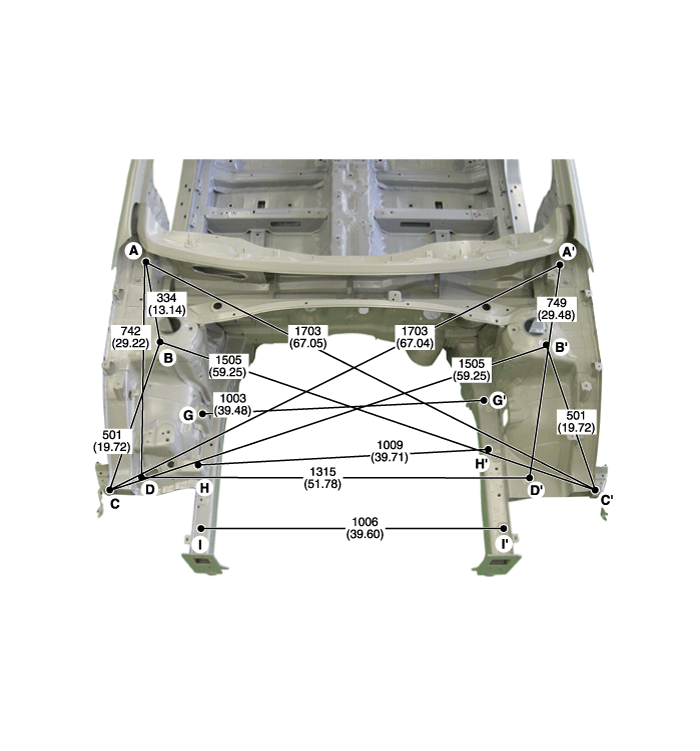
| * These dimensions indicated in this figure are actual-measurement dimensions. [ Unit : mm (inch) ] |
| Front Body C |
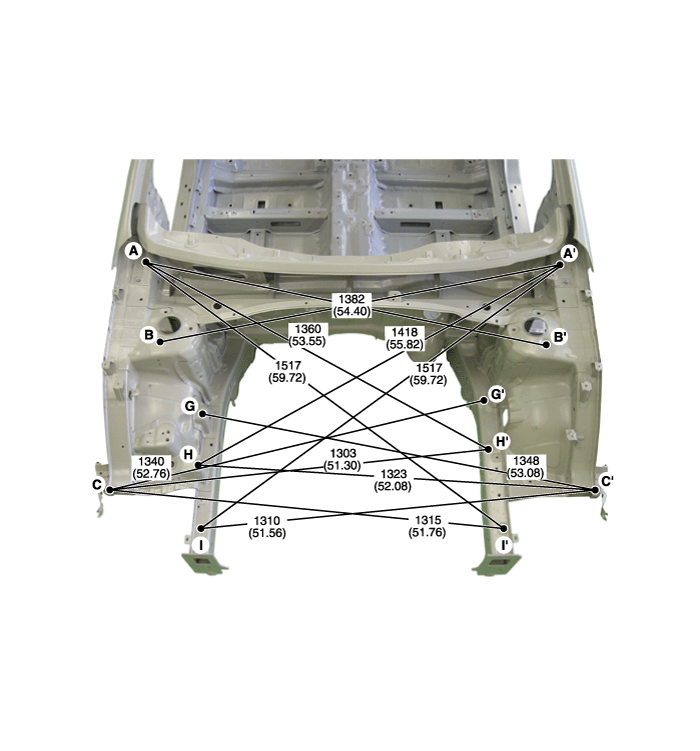
| * These dimensions indicated in this figure are actual-measurement dimensions. [ Unit : mm (inch) ] |
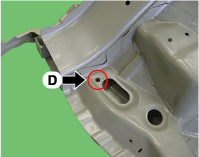
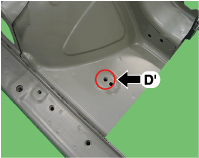
| Front Body D |
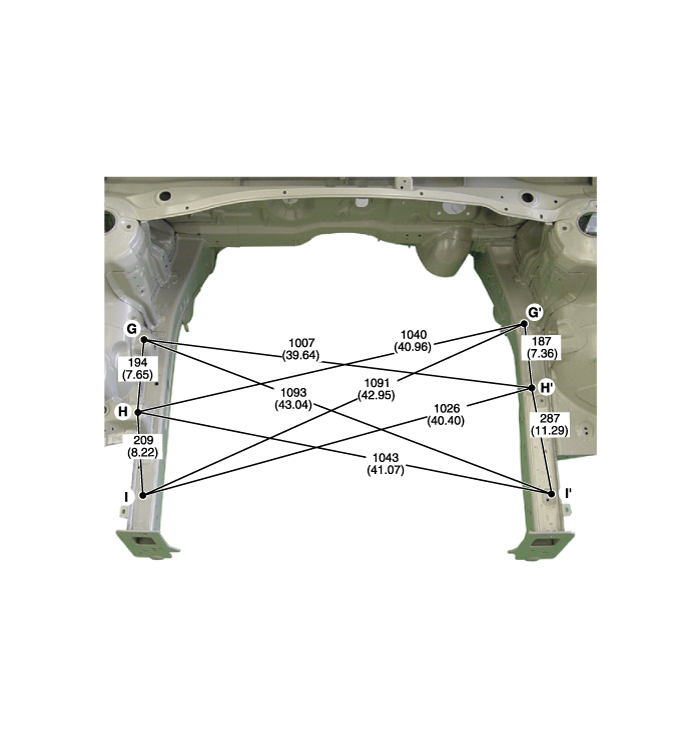
| * These dimensions indicated in this figure are actual-measurement dimensions. [ Unit : mm (inch) ] |
|
|
|
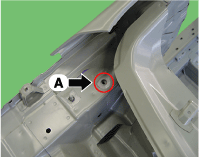
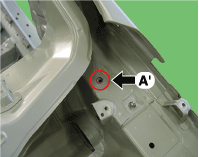
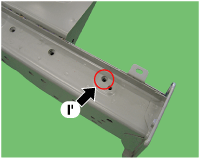
| Hood hinge mounting hole (O13) | Hood hinge mounting hole (O13) | Front shock absorber mounting hole (O13) |
|
|
|
| Fender apron upper member corner | Fender apron inner panel tooling hole (O8) | Fender apron inner panel tooling hole (O6.6) |
|
|
|
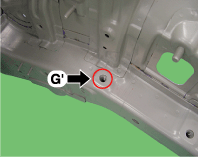
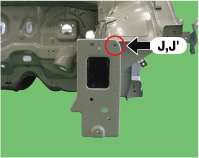
| Front pillar outer corner | Front pillar outer corner | Engine mounting bracket hole (O13) |
|
|
|
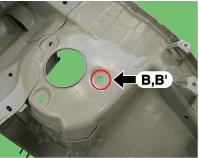
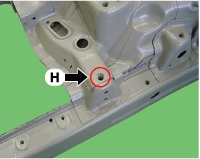
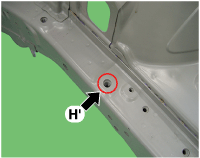
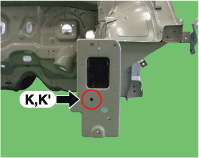
| Transaxle mounting hole (O15) | Engine mounting bracket hole (O15) | Transaxle mounting hole (O15) |

|
|
|
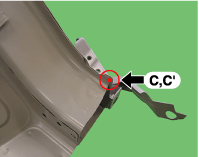
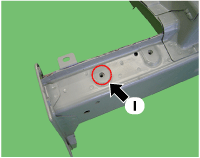
| Front side member tooling hole (O9) | Front side member tooling hole (O9) | Front end module mounting hole (O9) |
| ||
| Front end module mounting hole (O11) |
 General Information
General 1. Basically, all measurements in this manual are taken with a tracking gauge. 2. When a measuring tape is used, check to be sure there is no elongation, twisting or bending...
 Side Body Body Repair
Side Body A * These dimensions indicated in this figure are actual-measurement dimensions. [ Unit : mm (inch) ] Side Body B * These dimensions indicated in this figure are actual-measurement dimensions...
Other information:
Hyundai Sonata LF 2014-2019 Service Manual: TPMS Sensor Description and Operation
Configuration State 1. Driving state Sensor transmissions occur every 1 minutes and pressure is measured every 15 seconds. 2. Stationary state Sensor transmissions does not occur and pressure is measured every 60 seconds. 3. Auto learning status When driving after stopping more than 15 minutes , sensor transmissions occur every 33 seconds and pressure is measured every 10...
Hyundai Sonata LF 2014-2019 Service Manual: Special Service Tools
Special Service Tools Tool(Number and Name)IllustrationUse09581-11000Piston expanderSpreading the rear disc brake piston.09580 - 0U000Brake piston adjusterRemoval and installation of the rear disc brake piston.09581-2T100Piston expanderSpreading the front disc brake piston...
Categories
- Manuals Home
- Hyundai Sonata Owners Manual
- Hyundai Sonata Service Manual
- Air Conditioning System
- General Information
- Cooling System
- New on site
- Most important about car
