Hyundai Sonata LF: Cooling System / Cooling Fan Repair procedures
Hyundai Sonata LF 2014-2019 Service Manual / Engine Mechanical System / Cooling System / Cooling Fan Repair procedures
| Removal and Installation |
Cooling Fan Assembly
| 1. |
Disconnect the battery terminals. |
| 2. |
Remove the under cover.
(Refer to Engine And Transaxle Assembly - "Engine Room Under Cover") |
| 3. |
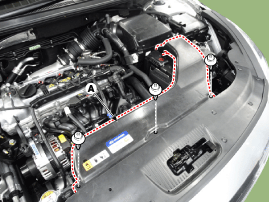
Disconnect the air duct(A).
|
| 4. |
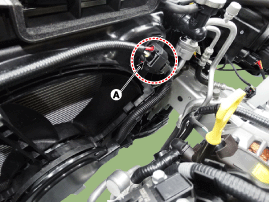
Disconnect the coolingfan connector(A).
|
| 5. |
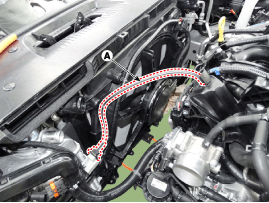
Disconnect the vacuum hose(A).
|
| 6. |
Remove the front bumper cover. (Refer to Body - "Front Bumper Cover") |
| 7. |
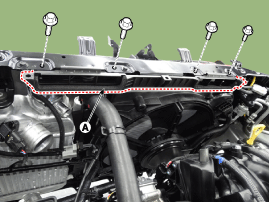
Remove the intake shield(A).
|
| 8. |
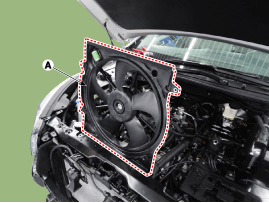
Loosen the mounting bolts and then remove the cooling fan(A).
|
| 9. |
Install in the reverse order of removal. |
Resistor
| 1. |
Disconnect the coolingfan connector(A).
|
| 2. |
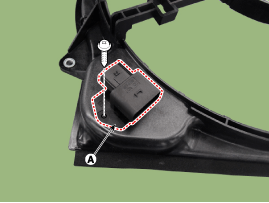
Remove the resistor (A) from the cooling fan shroud.
|
| 3. |
Install in the reverse order of removal. |
Disassembly
| 1. |
Remove the cooling fan (A) from the cooling fan assembly.
|
| 2. |
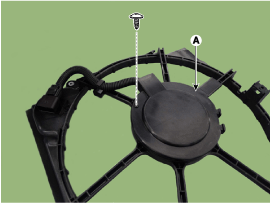
Remove the cooling fan motor cover(A).
|
| 3. |
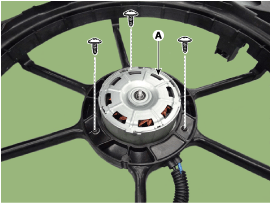
Remove the cooling fan motor(A).
|
| 4. |
Install in the reverse order of removal. |
| Inspection |
Fan Motor
| 1. |
Disconnect the fan motor connector from the resistor. |
| 2. |
Connect the battery voltage to the "+" terminal and ground to " - " terminal. |
| 3. |
Check the cooling fan motor operates well. |
Other information:
Hyundai Sonata LF 2014-2019 Service Manual: Front Strut Assembly Components and Components Location
C..
Hyundai Sonata LF 2014-2019 Service Manual: General Information
General Troubleshooting Information Before Troubleshooting 1. Check applicable fuses in the appropriate fuse/relay box. 2. Check the battery for damage, state of charge, and clean and tight connections. (Refer to Engine Electrical System - "Battery") • Do not quick-charge a battery unless the battery ground cable has been disconnected, otherwise you will damage the alternator diodes...
Categories
- Manuals Home
- Hyundai Sonata Owners Manual
- Hyundai Sonata Service Manual
- Transmission Gear Oil Repair procedures
- Engine Control / Fuel System
- ESP(Electronic Stability Program) System
- New on site
- Most important about car
Copyright © 2026 www.hsonatalf.org

