Hyundai Sonata LF: Rear Seat / Rear Seat Back Cover Repair procedures
Hyundai Sonata LF 2014-2019 Service Manual / Body (Interior and Exterior) / Rear Seat / Rear Seat Back Cover Repair procedures
| Replacement |
| [LH] |
|
|
| 1. |
Remove the rear seat back assembly [LH].
(Refer to Rear Seat - "Rear Seat Assembly") |
| 2. |
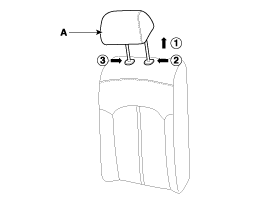
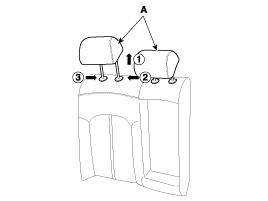
Remove the rear seat headrest (A).
|
| 3. |
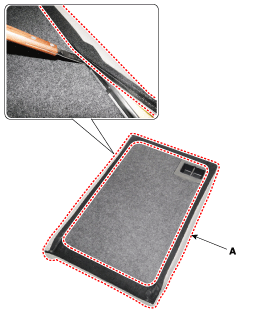
Using a screwdriver or remover, remove the rear seat back cover (A).
|
| 4. |
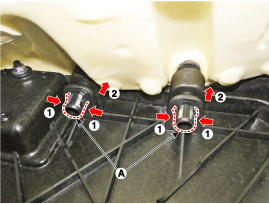
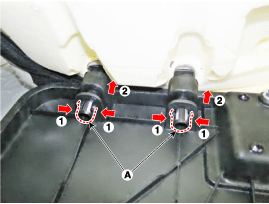
Pull out the rear seat headrest guides (A) while pinching both sides of the lower part of the guides, and remove them.
|
| 5. |
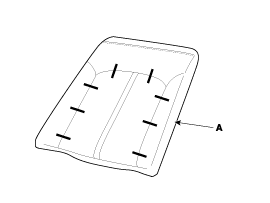
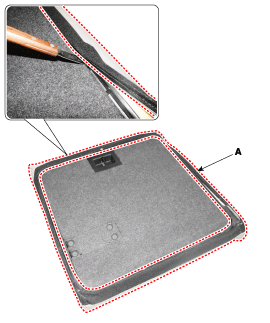
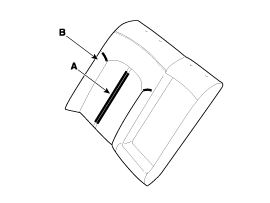
After removing both the clips and velcro tape on the rear of seat back and remove the seat back cover (A).
|
| 6. |
Install in the reverse order of removal.
|
[RH]
Put on gloves to protect your hands. |
|
| 1. |
Remove the rear seat back assembly [RH].
(Refer to Rear Seat - "Rear Seat Assembly") |
| 2. |
Remove the rear seat back armrest.
(Refer to Rear Seat - "Rear Seat ") |
| 3. |
Remove the rear seat headrest (A).
|
| 4. |
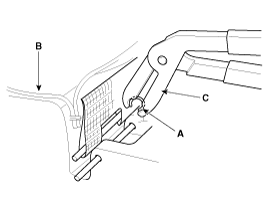
Using a screwdriver or remover, remove the rear seat back cover (A).
|
| 5. |
Turn the rear seat back cover inside out. Then pull out the
headrest guides (A) while pinching both sides of the lower part of the
guides, and remove them.
|
| 6. |
After removing both the clips and velcro tape (A) on the rear of seat back and remove the seat back cover (B).
|
| 7. |
Install in the reverse order of removal.
|
Other information:
Hyundai Sonata LF 2014-2019 Service Manual: Purge Control Solenoid Valve (PCSV) Specifications
S..
Hyundai Sonata LF 2014-2019 Service Manual: AVN(Audio Video Navigation) head unit Repair procedures
Removal • Take care not to scratch the cluster fascia panel and related parts. • Eject all the disc before removing the AVN head unit to prevent damaging the DVD player's load mechanism. • Wrap the protective tape on the tool to disassemble with the screwdriver or remover...
Categories
- Manuals Home
- Hyundai Sonata Owners Manual
- Hyundai Sonata Service Manual
- Air Conditioning System
- Brake System
- Transmission Gear Oil Repair procedures
- New on site
- Most important about car
Copyright © 2025 www.hsonatalf.org


