Hyundai Sonata LF: Rear Suspension System / Rear Cross Member Repair procedures
Hyundai Sonata LF 2014-2019 Service Manual / Suspension System / Rear Suspension System / Rear Cross Member Repair procedures
| Replacement |
| 1. |
Raise the vehicle, and make sure it is securely supported. |
| 2. |
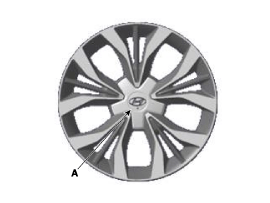
Remove the wheel cap (A).
|

| 3. |
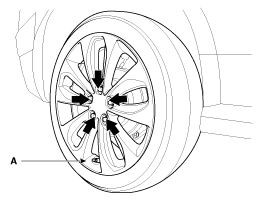
Remove the front wheel and tire (A) from front hub.
|
| 4. |
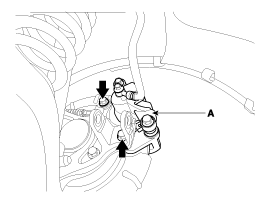
Remove the brake caliper mounting bolts and then place the brake caliper assembly (A) with wire.
[General]
[EPB]
|
| 5. |
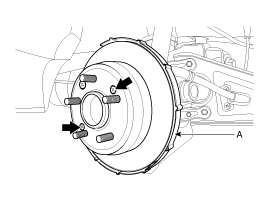
Loosen the mount screw and then brake disc (A).
|
| 6. |
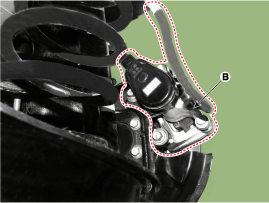
Loosen the rear upper arm mounting bolt and then remove the rear upper arm (A).
|
| 7. |
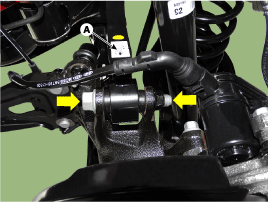
Disconnect the wheel speed sensor connector (A).
|
| 8. |
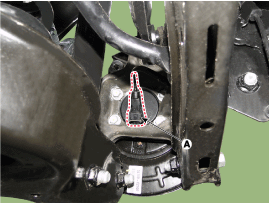
Disconnect the parking cable mounting clip (A), remove the parking cable (B). If EPB type, release the EPB.
|
| 9. |
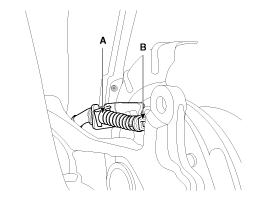
Loosen the trailing arm mounting nut (A), and then remove the trailing arm (B).
|
| 10. |
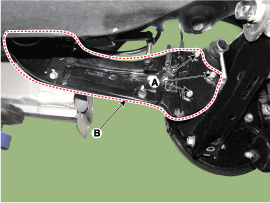
Remove the assist arm protector.
|
| 11. |
Remove the rear lower arm protector.
|
| 12. |
Loosen the bolt and then remove the assist arm.
|
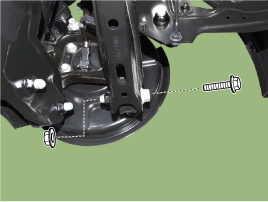
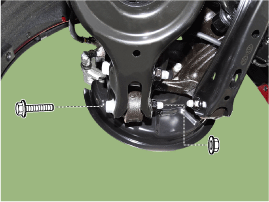
| 13. |
Loosen the lower arm (A) mounting bolts and remove the knuckle assembly (B).
|
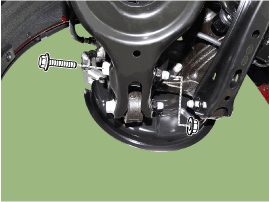
| 14. |
Loosen the mounting bolt and nut. And then separate the shock absorber from the lower arm.
|
| 15. |
Remove the rear muffler.
(Refer to Engine Machanical System - "Muffler") |
| 16. |
Remove the rear stabilizer bar.
(Refer to Rear Suspension System - " Rear Stabilizer Bar") |
| 17. |
After setting a jack, loosen the bolts and then remove the rear sub frame
|

| 18. |
Remove the rear lower arm.
(Refer to Rear Suspension System - "Rear Lower Arm") |
| 19. |
Remove the rear shock absorber.
(Refer to Rear Suspension System - "Rear Shock Absorber") |
| 20. |
Remove the rear upper arm.
(Refer to Rear Suspension System - "Rear Upper Arm") |
| 21. |
Remove the rear assist arm.
(Refer to Rear Suspension System - "Rear Assist Arm") |
| 22. |
Installation is the reverse of removal. |
| 23. |
Check the wheel Alignment.
(Refer to Tires/Wheels - "Alignment") |
 Rear Coil Spring Repair procedures
Replacement 1. Raise the vehicle, and make sure it is securely supported. 2. Remove the wheel cap (A). Be careful not to damage to the wheel cap (A) when removing the it...
 Tires/Wheels
..
Other information:
Hyundai Sonata LF 2014-2019 Service Manual: Rear Door Belt Outside Weatherstrip Repair procedures
Replacememt 1. Pull down rear door window glass by pressing the power window glass switch. 2. Remove the rear door belt outside weatherstrip (A). 3. Install in the reverse order of removal. • Replace any damaged clips...
Hyundai Sonata LF 2014-2019 Service Manual: Schematic Diagrams
C..
Categories
- Manuals Home
- Hyundai Sonata Owners Manual
- Hyundai Sonata Service Manual
- Heating, Ventilation and Air Conditioning
- Timing System
- Brake System
- New on site
- Most important about car

Copyright © 2026 www.hsonatalf.org