
Hyundai Sonata LF: Audio / Audio Remote Control Repair procedures
Hyundai Sonata LF 2014-2019 Service Manual / Body Electrical System / Audio / Audio Remote Control Repair procedures
| Inspection |
| 1. |
Check for resistance between terminals in each switch position (LH).
[LH : Audio + Hands free]
|
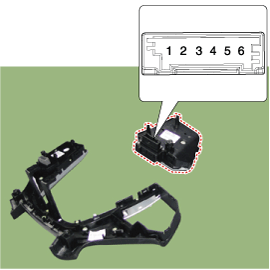
| 2. |
Check for resistance between terminals in each switch position (RH).
[RH : Audio + Hands free]
|
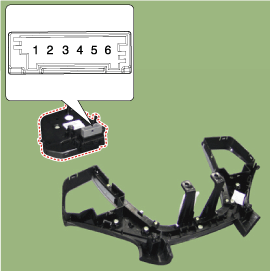
| Removal |
| 1. |
Disconnect the negative (-) battery terminal. |
| 2. |
Remove the steering wheel assembly.
(Refer to Steering System - "Steering Wheel") |
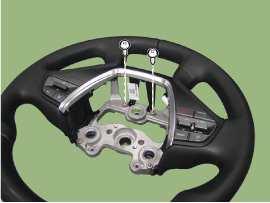
| 3. |
Remove the screw from the steering cover.
|
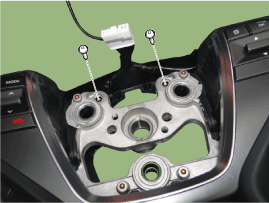
| 4. |
Remove the steering back cover (A).
|
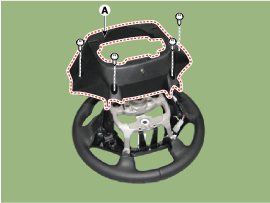
| 5. |
Remove the steering remote control connector (A).
|
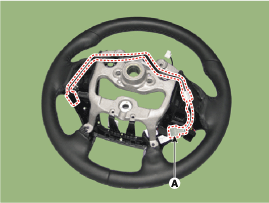
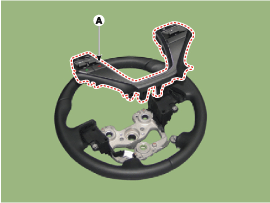
| 6. |
Remove the steering remote control (A) after loosening the screws.
|
| Installation |
| 1. |
Install the steering wheel remote control after connecting the connector. |
| 2. |
Connect the negative (-) battery terminal. |


Other information:
Hyundai Sonata LF 2014-2019 Service Manual: Components and Components Location
C..
Hyundai Sonata LF 2014-2019 Service Manual: Electro Chromic Inside Rear View Mirror
Components and Components Location Components (1) Components (2) Components (3) Description and Operation Description The ECM (Electro Chromatic inside rear view Mirror) is intended dim the reflecting light in the rear view mirror. The forward facing sensor detects brightness of the surroundings, while the rearward looking sensor is for the light from the rear...
Categories
- Manuals Home
- Hyundai Sonata Owners Manual
- Hyundai Sonata Service Manual
- Body Electrical System
- Components and Components Location
- Repair procedures
- New on site
- Most important about car

Copyright © 2026 www.hsonatalf.org