Hyundai Sonata LF: Fuel Delivery System / Fuel Tank Repair procedures
| Removal |
| 1. |
Release the residual pressure in fuel line.
(Refer to the Fuel Delivery System - "Release Residual Pressure in Fuel Line") |
| 2. |
Remove the rear seat cushion.
(Refer to Body - "Rear Seat Assembly") |
| 3. |
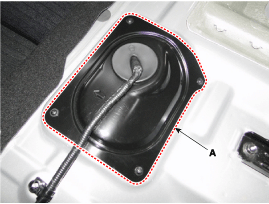
Remove the fuel pump service cover (A) in the trunk.
|
| 4. |
Disconnect the fuel feed tube quick-connector (A). |
| 5. |
Disconnect the fuel pressure sensor connector (B). |
| 6. |
Disconnect the fuel pump control module (C).
|

| 7. |
Lift the vehicle. |
| 8. |
Remove the main muffer.
(Refer to Engine Mechanical System - "Muffler") |
| 9. |
Support the fuel tank with a jack. |
| 10. |
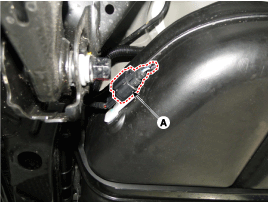
Disconnect the fuel filler hose (A). |
| 11. |
Disconnect the vapor hose quick-connector (A).
|
| 12. |
Disconnect the fuel tank pressure sensor extension connector (A).
|
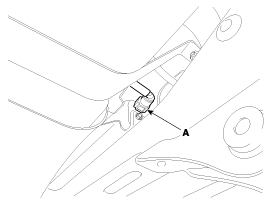
| 13. |
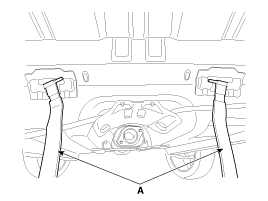
Remove the fuel tank bands (A) installation nuts.
|
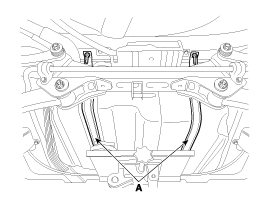
| 14. |
Remove the fuel tank after removing the fuel tank band (A) as below.
|
| Installation |
| 1. |
Install in the reverse order of removal.
|
 Repair procedures
Fuel Pressure Test (Low pressure system) 1. Release the residual pressure in fuel line. (Refer to the Fuel Delivery System - Repair Procedures - "Release Residual Pressure in Fuel Line")...
 Fuel Pump Repair procedures
Inspection [Fuel sender] 1. Turn the ignition switch OFF, and then remove battery (-) cable. 2. Remove the fuel pump assembly. 3. Using an ohmmeter, measure the resistance between terminals 1 and 6 of sender connector (A) at each float level...
Other information:
Hyundai Sonata LF 2014-2019 Service Manual: Cylinder Head Repair procedures
Removal Engine removal is not required for this procedure. • Use fender covers to avoid damaging painted surfaces. • To avoid damaging the cylinder head, wait until the engine coolant temperature drops below normal temperature before removing it...
Hyundai Sonata LF 2014-2019 Service Manual: Water Pipe Repair procedures
Removal and Installation 1. Remove the water temperature control assembly. (Refer to Colling System - "Water Temperature Control Assembly") 2. Remove the water pipe (A). Tightening torque M6 bolt and nuts : 9.8 ~ 11.8N.m (1.0 ~ 1.2kgf...
Categories
- Manuals Home
- Hyundai Sonata Owners Manual
- Hyundai Sonata Service Manual
- Emission Control System
- Engine Mechanical System
- Driveshaft and axle
- New on site
- Most important about car
