Hyundai Sonata LF: Seat Belt Pretensioner / Emergency Fastening Device (EFD) Repair procedures
Hyundai Sonata LF 2014-2019 Service Manual / Restraint / Seat Belt Pretensioner / Emergency Fastening Device (EFD) Repair procedures
| Removal |
| 1. |
Disconnect the battery negative cable and wait for at least 3 minutes before beginning work. |
| 2. |
Remove the front seat.
(Refer to Body - "Front Seat Assembly") |
| 3. |
Remove the rear seat.
(Refer to Body - "Rear Seat Assembly") |
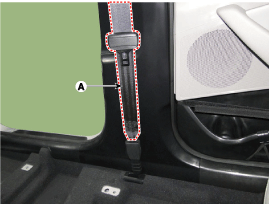
| 4. |
Remove the front anchor seat belt (A).
|

| 5. |
Remove the door scuff trim.
(Refer to Body - "Interior Trim") |
| 6. |
Remove the center pillar trim.
(Refer to Body - "Interior Trim") |
| 7. |
Remove the floor carpet assembly.
(Refer to Body - "Floor Carpet") |
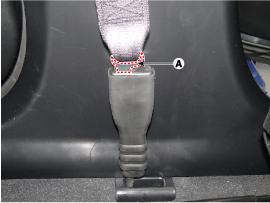
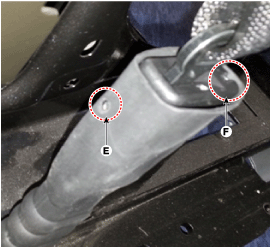
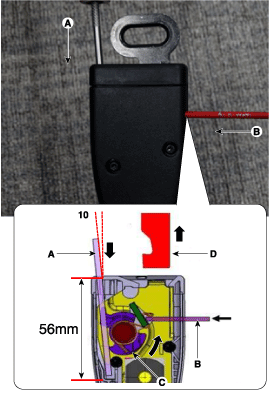
| 8. |
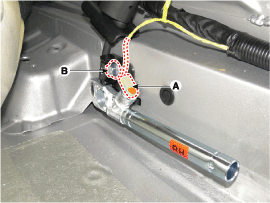
Disconnect the anchor pretensioner (A) |
| 9. |
Loosen the monuting bolt (B) and remove the anchor pretensioner
|
| Installation |
| 1. |
Installation is reverse of removal. |
| 2. |
Connect the battery (-) terminals. |

 Brake System
..
Other information:
Hyundai Sonata LF 2014-2019 Service Manual: Components and Components Location
C..
Hyundai Sonata LF 2014-2019 Service Manual: Front Pillar Trim Repair procedures
Replacement • Put on gloves to protect your hands. • When prying with a flat-tip screwdriver or use a prying trim tool, wrap it with protective tape, and apply protective tape around the related parts, to prevent damage...
Categories
- Manuals Home
- Hyundai Sonata Owners Manual
- Hyundai Sonata Service Manual
- Engine Control / Fuel System
- Engine Control System
- Engine And Transmission Assembly
- New on site
- Most important about car

Copyright © 2025 www.hsonatalf.org