Hyundai Sonata LF: Timing System / Drive Belt Repair procedures
Hyundai Sonata LF 2014-2019 Service Manual / Engine Mechanical System / Timing System / Drive Belt Repair procedures
| Removal |
| 1. |
Disconnect the battery negative terminal. |
| 2. |
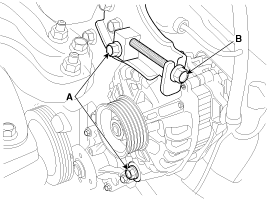
Loosen the alternator tension adjusting bolt (A) to loosen tension.
|
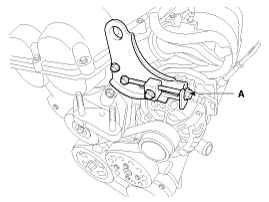
| 3. |
Remove the drive belt (A).
|
| Inspection |
Drive Belt Inspection
Visually check the belt for excessive wear, frayed cords etc.
If any defect has been found, replace the drive belt.
Cracks on the rib side of a belt are considered acceptable. If the belt has chunks missing from the ribs, it should be replaced. |

| Adjustment |
Drive belt tension measurement and adjustment
Belt tension measurement
Measure the belt tension using a mechanical tension gauge or a sonic tension meter.
Tension
New Belt :
961.0 ~ 980.7 N (98.0 ~ 100.0 kgf, 216.1 ~ 220.5 lbf)
Used Belt :
637.4 ~ 735.5 N (65.0 ~ 75.0 kgf, 143.3 ~ 165.3 lbf) |
|

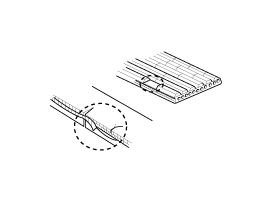
Using a mechanical tension gauge (BT-33-73F, BTG-2 type)
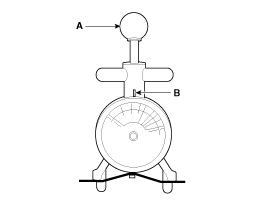
| 1. |
While pressing the handle (A) of the gauge, insert the belt
(B) between pulley and pulley (or idler) into the gap between spindle
(C) and hook (D).
|
| 2. |
After releasing the handle (A), read a value on the dial pointed by the indicator (B).
|
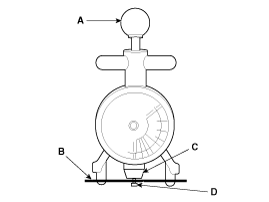
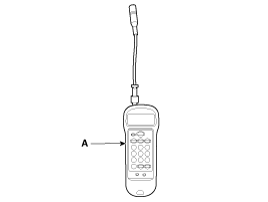
Using a sonic tension meter (U-505/507 type)
| 1. |
Input the belt specifications into the tension meter.
| ||||||||||||||||||||||
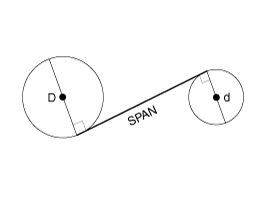
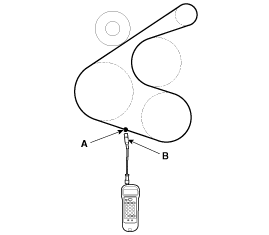
| 2. |
Locate the micro phone (B) close to the center of belt span
(A) and bounce the belt by finger 2~3 times. Read a value on the
display.
[With A/C]
[Without A/C]
|
If adjustment is necessary:
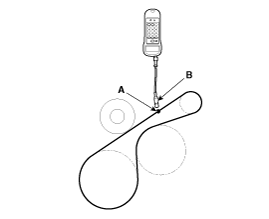
| 1. |
Loosen the mounting bolts (A). |
| 2. |
Tighten the adjusting bolt (B) clockwise in loose tension ; loosen the bolt counterclockwise in high tension.
|
| 3. |
Recheck tension of the belt. |
| 4. |
After adjusting tension, tighten the through bolts.
|
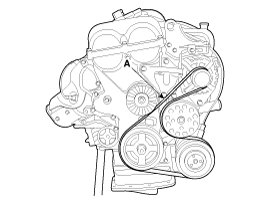
| Installation |
| 1. |
Install the drive belt (A).
|
| 2. |
Adjust tension by tightening the alternator tension adjust bolt (B) and then install the mounting bilts (A).
|
| 3. |
Connect the battery negative terminal. |


Categories
- Manuals Home
- Hyundai Sonata Owners Manual
- Hyundai Sonata Service Manual
- Engine Control System
- Alternator Repair procedures
- Engine Mechanical System
- New on site
- Most important about car

Copyright © 2026 www.hsonatalf.org