Hyundai Sonata LF: Dual Clutch Transmission Assembly / DCT (Dual Clutch Transmission) Repair procedures
Hyundai Sonata LF 2014-2019 Service Manual / DCT (Dual Clutch Transmission) System / Dual Clutch Transmission Assembly / DCT (Dual Clutch Transmission) Repair procedures
| Removal |
| 1. |
Remove the air cleaner assembly and air duct.
(Refer to Engine Mechnical System - "Air cleaner") |
| 2. |
Remove the TCM.
(Refe to Dual Clutch Transmission Control System - "TCM") |
| 3. |
Remove the battery and tray.
(Refer to Engine Electrical System - "Battery") |
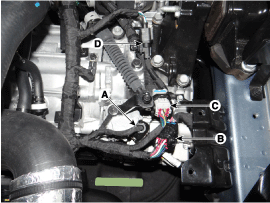
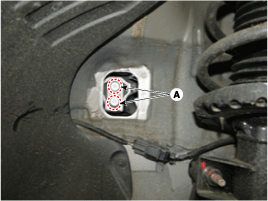
| 4. |
Disconnect the connectors in the illustration below.
(A) Inhibitor switch connector
(B) Clutch actuator connector
(C) Gear actuator solenoid connector
(D) Input shaft speed sensor connector
|
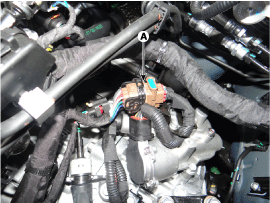
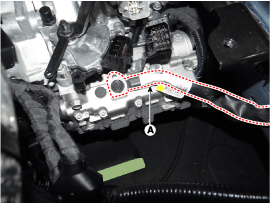
| 5. |
Disconnect the gear actuator motor connector (A).
|
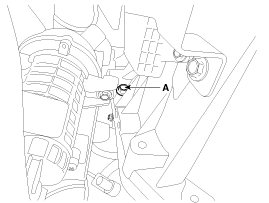
| 6. |
Remove the ground (A) and wiring bracket (B-2ea) after removing the bolts.
|
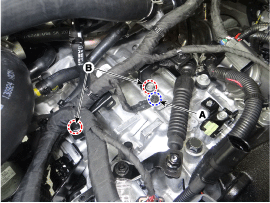
| 7. |
Remove the control cable (B) after removing the nut (A).
|
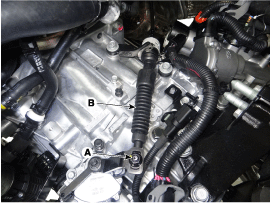
| 8. |
Remove the ground (A) after removing the bolts.
|
| 9. |
Loosen the transmission upper mounting bolts (A-2ea) and the starter mounting bolt (B-1ea).
|
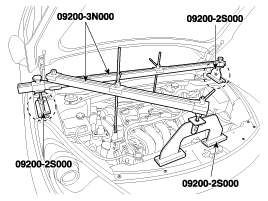
| 10. |
Assemble the engine support fixture(beam No.: 09200-38001 or 09200-3N000, supporter No.: 09200-2S000).
(Refer to Special Service Tools - "Engine support fixture assembly drawing") |
| 11. |
Using the engine support fixture, hold the engine and transaxle assembly safely.
|
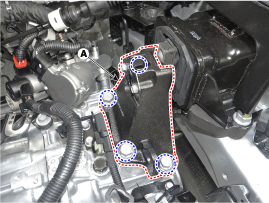
| 12. |
Remove the dual clutch transmission mounting bracket cover (A).
|
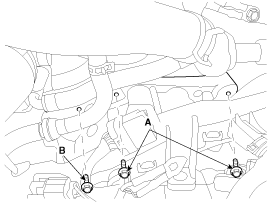
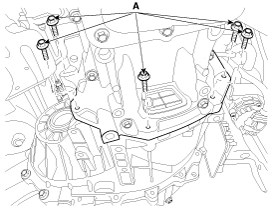
| 13. |
Remove the dual clutch transmission mounting support bracket bolts (A).
|
| 14. |
Remove the dual clutch transmission mounting support bracket (A).
|
| 15. |
Remove the under cover.
(Refer to Engine Mechanical System - "Engine Room Under Cover") |
| 16. |
Remove the front drive shaft.
(Refer to Driveshaft and axle - "Drive shaft assembly") |
| 17. |
Remove the sub frame.
(Refer to Suspension System - "Sub Frame") |
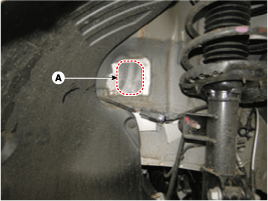
| 18. |
Loosen the intercooler inlet pipe mounting bolts (A-2ea).
|
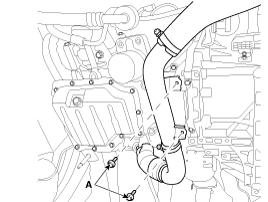
| 19. |
Separate the vacuum pump (A) from the transmission by loosening the bolts (B-2ea).
|
| 20. |
Loosen the starter mounting bolt (A).
|
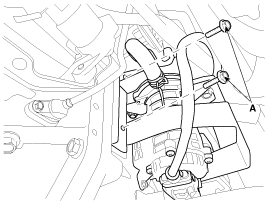
| 21. |
Support the transmission safely by using the jack. |
| 22. |
Loosen the transmission lower mounting bolts (A-5ea).
|
| 23. |
After separating the transmission from the engine, remove the transmission by lowering the jack slowly.
|

| Installation |
| 1. |
Install in the reverse order of removal.
|

| 2. |
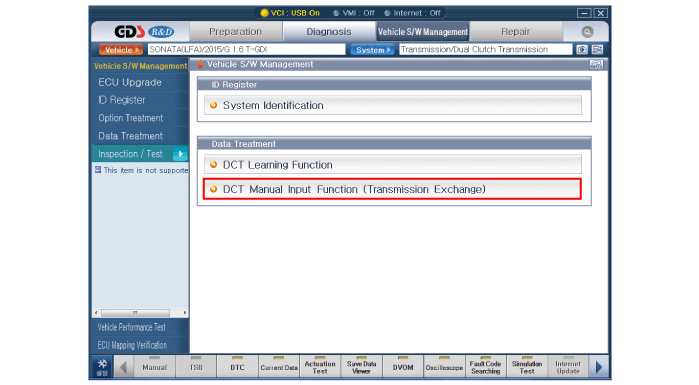
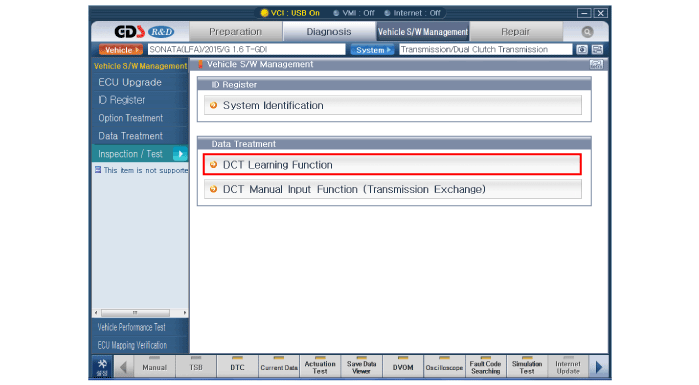
Follow the separated each procedure as below according to reinstallation or replacing with a new dual clutch transmission.
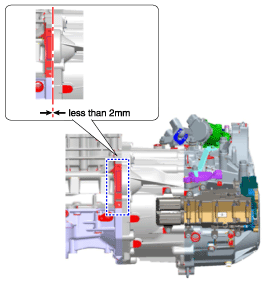
In case of the reinstallation
|
| 3. |
In case of the replacing with a new dual clutch transmission.
|
 DCT (Dual Clutch Transmission) Components and Components Location
Components (1) 1. Dual clutch transmission assembly2. Clutch actuator3. Gear actuator4. Roll rod supprot bracket5. Engine room under cover6. Roll rod bracket7...
 Transmission Gear Oil General Information
General Information 1. Check & Change intervals Check & ReplenishmentChangeCapacityOil specificationNormal UseSevere Use60000 km / 4 years(40000 miles / 4 years) No service required120000 km(80000 miles)1...
Other information:
Hyundai Sonata LF 2014-2019 Service Manual: Water Jacket Seperator Repair procedures
Remove and Installation 1. Remove the cylinder head assembly. (Refet to Cylinder Head Assembli - "Cylinder Head") 2. Remove the water jacket seperator (A). Be careful not to deform or damage it when removing. 3. Install in the reverse order of removal...
Hyundai Sonata LF 2014-2019 Service Manual: External AMP Components and Components Location
C..
Categories
- Manuals Home
- Hyundai Sonata Owners Manual
- Hyundai Sonata Service Manual
- Engine Control / Fuel System
- Timing System
- Heating, Ventilation and Air Conditioning
- New on site
- Most important about car

Copyright © 2026 www.hsonatalf.org