Hyundai Sonata LF: Air Conditioning System / Condenser Repair procedures
Hyundai Sonata LF 2014-2019 Service Manual / Heating, Ventilation and Air Conditioning / Air Conditioning System / Condenser Repair procedures
| Inspection |
| 1. |
Check the condenser fins for clogging and damage. If clogged,
clean them with water, and blow them with compressed air. If bent,
gently bend them using a screwdriver or pliers. |
| 2. |
Check the condenser connections for leakage, and repair or replace it, if required.
|
| Replacement |
| [Theta 2.4 GDI] |
| 1. |
Recover the refrigerant with a recovery/ recycling/ charging station. |
| 2. |
Disconnect the negative (-) battery terminal. |
| 3. |
Remove the front bumper.
(Refer to Body - "Front Bumper Cover") |
| 4. |
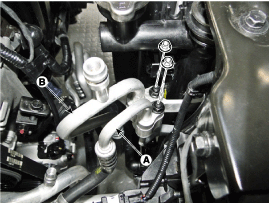
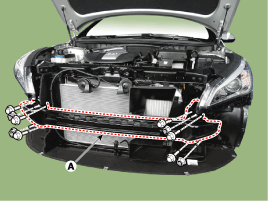
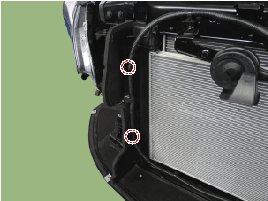
Remove the 2 nuts, and then disconnect the discharge line (A) and liquid line (B) from the condenser.
|
| 5. |
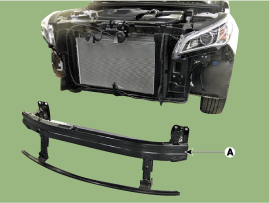
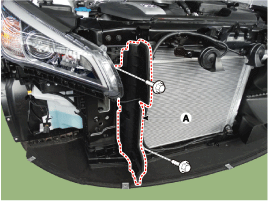
After loosening the mounting bolts and nuts, then remove the front bumper frame (A).
|
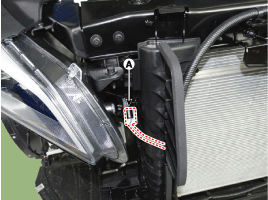
| 6. |
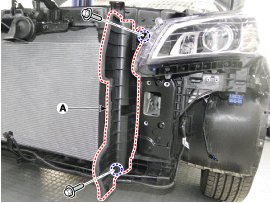
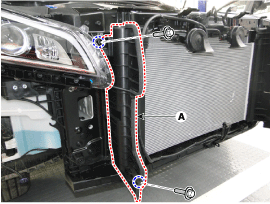
After loosening the mounting bolts, then remove the side air guard (A).
[LH]
[RH]
|
| 7. |
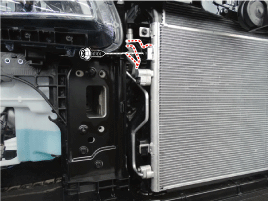
Remove the hood latch connected (A).
|
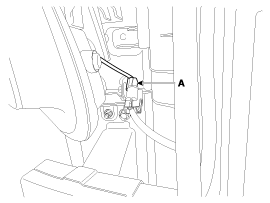
| 8. |
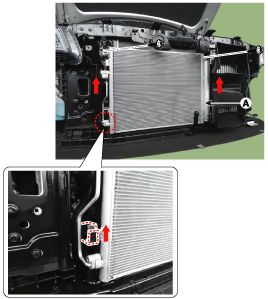
Remove the condenser (A) from radiator.
|
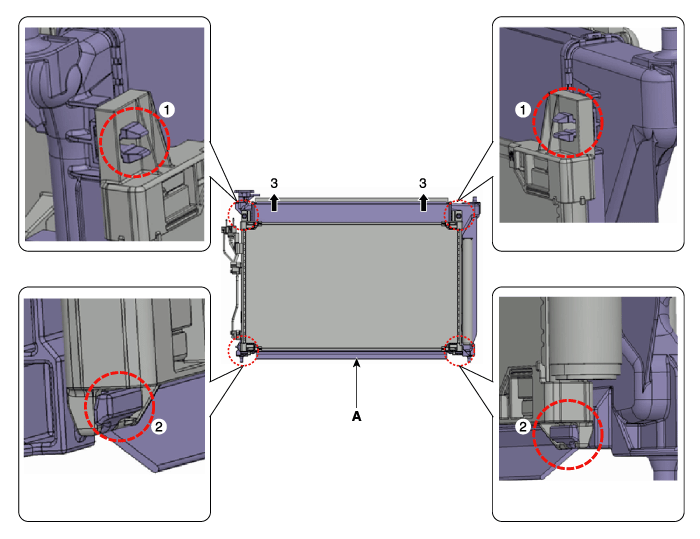
| 9. |
Install in the reverse order of removal.
|

[Gamma 1.6 T-GDI / Theta 2.0 T-GDI]
| 1. |
Recover the refrigerant with a recovery / recycling / charging station. |
| 2. |
Disconnect the negative (-) battery terminal. |
| 3. |
Remove the front bumper.
(Refer to Body - "Front Bumper Cover") |
| 4. |
Remove the 2 nuts, and then disconnect the discharge line (A) and liquid line (B) from the condenser.
|
| 5. |
After loosening the mounting bolts and nuts, then remove the front bumper frame (A).
|
| 6. |
Disconnect the hood latch connector (A) and then remove the wiring mounting clips.
|
| 7. |
After loosening the mounting bolts, then remove the side air guard (A).
|
| 8. |
Loosen the condenser bracket mounting bolt.
|
| 9. |
Loosen the mounting bolts and then remove the condenser (A) from radiator.
|
| 10. |
Install in the reverse order of removal.
|

 Receiver-Drier Repair procedures
Replacement 1. Remove the condenser. 2. Remove the cap (B) on the bottom of the condenser with a L wrench [Hex 14] (A). Tightening torque : 4...
Other information:
Hyundai Sonata LF 2014-2019 Service Manual: Repair procedures
Fuel Pressure Test (Low pressure system) 1. Release the residual pressure in fuel line. (Refer to the Fuel Delivery System - Repair Procedures - "Release Residual Pressure in Fuel Line"). When removing the fuel pump fuse, a Diagnostic Trouble Code (DTC) may occur...
Hyundai Sonata LF 2014-2019 Service Manual: Fuel Pressure Control Valve Specifications
S..
Categories
- Manuals Home
- Hyundai Sonata Owners Manual
- Hyundai Sonata Service Manual
- DCT (Dual Clutch Transmission) System
- General Information
- Brake System
- New on site
- Most important about car

Copyright © 2026 www.hsonatalf.org