Hyundai Sonata LF: Engine Control System / Camshaft Position Sensor (CMPS) Repair procedures
| 1. |
Check the signal waveform of the CMPS and CKPS using the GDS.
Specification: Refer to “Wave Form�
|
|
| • |
DON’T remove the camshaft position sensor while the engine
is running or right after engine is turned off. The part and engine oil
is hot and can cause burns.
|
|
| 1. |
Turn the ignition switch OFF and disconnect the battery negative (-) cable. |
| 2. |
Disconnect the camshaft position sensor connector (A). |
| 3. |
Remove the installation bolt (B), and then remove the sensor. 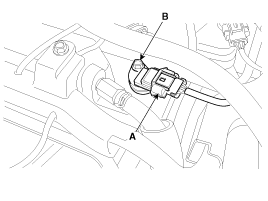
|
| 1. |
Turn the ignition switch OFF and disconnect the battery negative (-) cable. |
| 2. |
Disconnect the camshaft position sensor connector (A). |
| 3. |
Remove the installation bolt (B), and then remove the sensor. 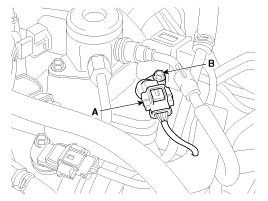
|
| • |
Install the component with the specified torques. |
| • |
Note that internal damage may occur when the component is dropped. If the component has been dropped, inspect before installing. |
|
| • |
Apply the engine oil to the O-ring. |
|
| • |
Insert the sensor in the installation hole and be careful not to damage. |
|
| • |
Be careful not to damage the sensor housing and the connector. |
| • |
Be careful not to damage the O-ring.
|
|
| 1. |
Install in the reverse order of removal.
Camshaft position sensor installation bolt:
9.8 ~ 11.8 N.m (1.0 ~ 1.2 kgf.m, 7.2 ~ 8.7 lb-ft)
|
|
Description
Knocking is a phenomenon characterized by undesirable
vibration and noise and can cause engine damage. Knock Sensor (KS) is
installed on the cylinder block and senses engine knocking...
Other information:
Components and Components Location
Components
1. Windshield glass 2. Windshield moulding mounting bracket3. Windshield glass side moulding4. Windshield glass upper moulding
Repair procedures
Removal
•
Put on gloves to protect your hands...
S..



 Knock Sensor (KS) Description and Operation