Hyundai Sonata LF: Charging System / Alternator Repair procedures
| Removal |
| 1. |
Disconnect the battery negative terminal. |
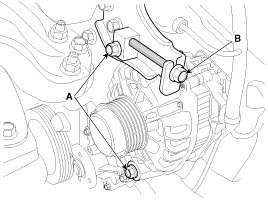
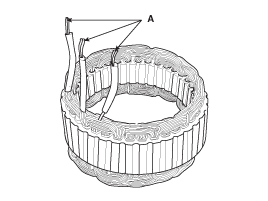
| 2. |
Loosen the mounting bolts (A) and then, turn the adjusting bolt (B) clockwise to loosen tension.
|
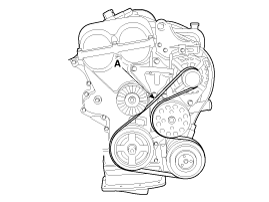
| 3. |
Remove the drive belt (A).
|
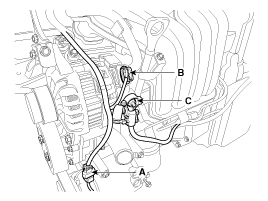
| 4. |
Disconnect the air compressor connector (A) and the
alternator connector (B), and remove the cable from alternator "B"
terminal (C).
|
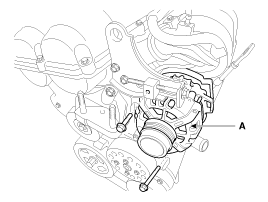
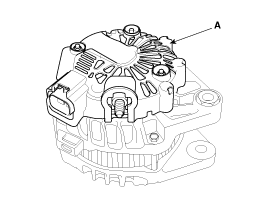
| 5. |
Remove the alternator (A).
|
| Installation |
| 1. |
Install in the reverse order of removal. |
| 2. |
Adjust the alternator belt tension after installation.
(Refer to Engine Mechanical System - "Drive Belt")
|
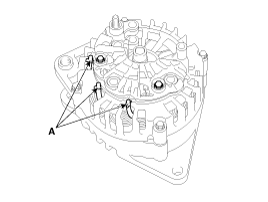
| Disassembly |
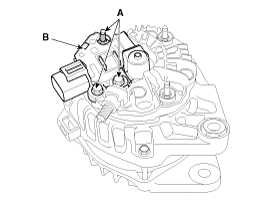
| 1. |
Remove the rear cover (A) after removing nuts.
|
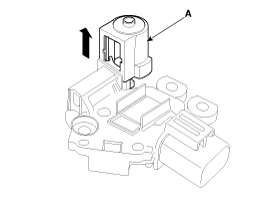
| 2. |
Remove the mounting bolts (A) and the brush holder assembly (B).
|
| 3. |
Remove the slip ring guide (A) after pulling it.
|
| 4. |
Remove the OAD(Overrunning Alternator Decoupler) cap.
|

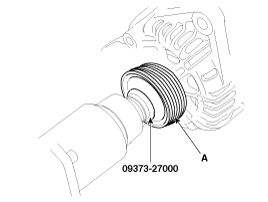
| 5. |
Remove the OAD(Overrunning Alternator Decoupler) pulley (A) using the special tool.
|
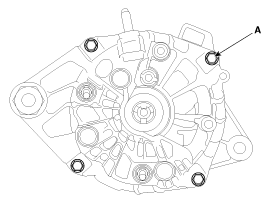
| 6. |
Unsolder the 3 stator leads (A).
|
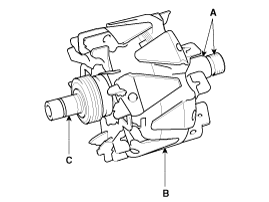
| 7. |
Remove the 4 through bolts (A).
|
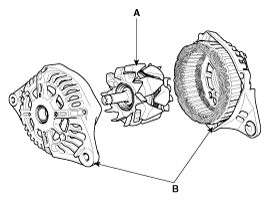
| 8. |
Disconnect the rotor (A) and bracket (B).
|
| Reassembly |
| 1. |
Reassemble in the reverse order of disassembly.
|
| Inspection |
| [Rotor] |
| 1. |
Check that there is continuity between the slip rings (C).
|
| 2. |
Check that there is no continuity between the slip rings and the rotor (B) or rotor shaft (A). |
| 3. |
If the rotor fails either continuity check, replace the alternator. |
| [Stator] |
| 1. |
Check that there is continuity between each pair of leads (A).
|
| 2. |
Check that there is no continuity between each lead and the coil core. |
| 3. |
If the coil fails either continuity check, replace the alternator. |
 Alternator Schematic Diagrams
Circuit Diagram • COM signal - When controlling the voltage generated, the ECM sends the target voltage data to the alternator via a PWM signal...
 Battery Description and Operation
Description [AGM Battery] AGM battery is used for especially heavy load on the vehicle network depending on equipment and requirements. AGM stands for Absorbent Glass Material Battery; that is absorbent glass fibre fleece...
Other information:
Hyundai Sonata LF 2014-2019 Service Manual: Fender
Components and Components Location Component Location 1. Fender assembly Repair procedures Replacement • Be careful not to damage the fender and body. • When removing the clips, use a clip remover...
Hyundai Sonata LF 2014-2019 Service Manual: Repair procedures
Adjustment Inspect Glass Alignment 1. Inspect the alignment of the movable glass (C) that is between the front (A) and rear (B) glass and if needed adjust it. Alignment adjustment Standard value [mm(in.)] (1) Front edge : 0 mm (0 in.) (2) Rear edge : 0 mm (0 in...
Categories
- Manuals Home
- Hyundai Sonata Owners Manual
- Hyundai Sonata Service Manual
- Suspension System
- Heating, Ventilation and Air Conditioning
- Engine Control / Fuel System
- New on site
- Most important about car
