Hyundai Sonata LF: Rear Door / Rear Door Trim Repair procedures
Hyundai Sonata LF 2014-2019 Service Manual / Body (Interior and Exterior) / Rear Door / Rear Door Trim Repair procedures
| Replacement |
|
|
| 1. |
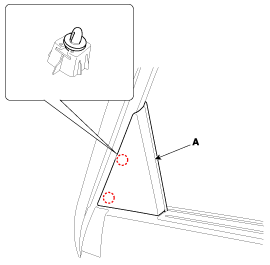
Using a screwdriver or remover, remove the rear door derta inner cover (A).
|
| 2. |
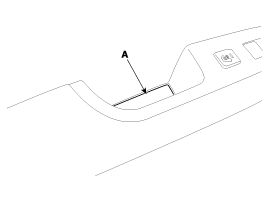
Using a flat-tip or remover, remove the rear door pull cap (A).
|
| 3. |
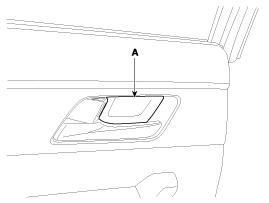
Pull the front door inside handle using a flat head
screwdriver and remove the cap (A) using the hole located inside of the
handle.
|
| 4. |
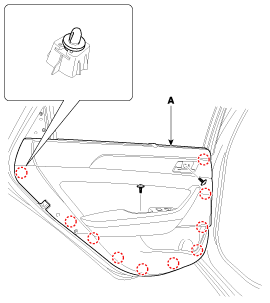
After loosening the mounting screws, then remove the rear door trim (A) by using a flat-tip screwdriver.
|
| 5. |
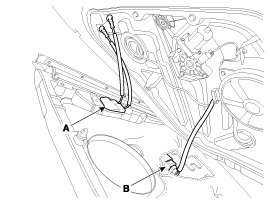
Remove the rear door inside handle cage (A). |
| 6. |
Disconnect the power window switch connector (B).
|
| 7. |
Remove the rear door side curtain assembly.
(Refer to Rear Door - "Rear Door Side Curtain Assembly") |
| 8. |
Install in the reverse order of removal.
|
 Rear Door Inside Handle Repair procedures
Replacement 1. Remove the rear door trim. (Refer to Rear Door - "Rear Door Trim") 2. Remove the rear door side curtain assembly. (Refer to Rear Door - "Rear door side curtain assembly") 3...
Other information:
Hyundai Sonata LF 2014-2019 Service Manual: Parking Assist Sensor Repair procedures
Removal 1. Disconnect the negative (-) battery terminal. 2. Remove the front/rear bumper cover. (Refer to Body - "Front Bumper Cover") (Refer to Body - "Rear Bumper Cover") 3. Disconnect the connector (B) from the parking assist sensor (A)...
Hyundai Sonata LF 2014-2019 Service Manual: ESP Control Unit Components and Components Location
C..
Categories
- Manuals Home
- Hyundai Sonata Owners Manual
- Hyundai Sonata Service Manual
- Body Electrical System
- Timing System
- Audio
- New on site
- Most important about car
Copyright © 2026 www.hsonatalf.org


