Hyundai Sonata LF: Rear Door / Rear Door Module Repair procedures
Hyundai Sonata LF 2014-2019 Service Manual / Body (Interior and Exterior) / Rear Door / Rear Door Module Repair procedures
| Replacement |
| 1. |
Remove the rear door window glass.
(Refer to Rear Door - "Rear Door Window Glass") |
| 2. |
Remove the rear door outside handle.
(Refer to Rear Door - "Rear Door Outside Handle") |
| 3. |
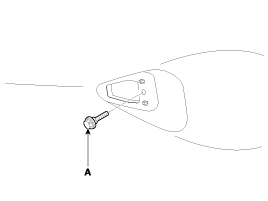
Loosen the rear door outside handle base mounting bolt (A).
|
| 4. |
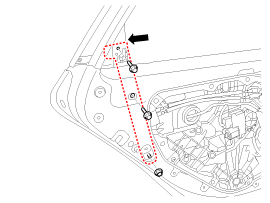
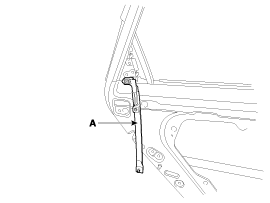
After loosening the mounting bolt and nuts, then remove the rear door channel (A).
|
| 5. |
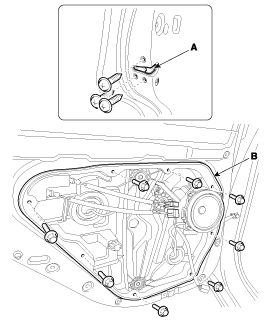
Loosen the rear door latch (A) mounting screws. |
| 6. |
After loosening the mounting bolts, then remove the rear door module (B).
|
| 7. |
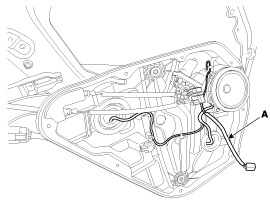
Disconnect the connectors and front door module wiring harness (A).
|
| 8. |
Remove the rear door latch assembly.
(Refer to Front Door - "Rear Door Latch") |
| 9. |
Reomove the rear speaker .
(Refer to Body Electrical System - "Speakers") |
| 10. |
Remove the rear power window motor.
(Refer to Body Electrical System - "Power Window Motor") |
| 11. |
Install in the reverse order of removal.
|
Other information:
Hyundai Sonata LF 2014-2019 Service Manual: Drive Belt Tensioner Components and Components Location
C..
Hyundai Sonata LF 2014-2019 Service Manual: Transmission Gear Oil Repair procedures
Inspection • In principle, the transmission oil is maintenance-free, and no exchange is required. But it must be inspected and replenished every 4 years or 40,000 miles. 1. Park the vehicle on flat ground and turn off the engine...
Categories
- Manuals Home
- Hyundai Sonata Owners Manual
- Hyundai Sonata Service Manual
- Intake And Exhaust System
- Transmission Gear Oil Repair procedures
- Timing System
- New on site
- Most important about car
Copyright © 2025 www.hsonatalf.org

