Hyundai Sonata LF: Fender / Repair procedures
Hyundai Sonata LF 2014-2019 Service Manual / Body (Interior and Exterior) / Fender / Repair procedures
| Replacement |
|

|

| 1. |
Remove the front bumper.
(Refer to Front Bumper - "Front Bumper Cover") |
| 2. |
Remove the head lamps.
(Refer to Body Electrical System - "Head Lamps") |
| 3. |
Remove the side sill moulding.
(Refer to Body Side Moulding - "Side Sill Moulding") |
| 4. |
Remove the front wheel guard.
(Refer to Body Side Moulding - "Front Wheel Guard") |
| 5. |
Remove the delta garnish.
(Refer to Body Side Moulding - "Delta Garnish") |
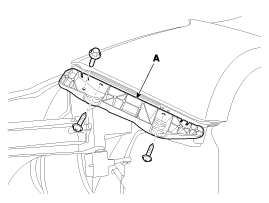
| 6. |
Remove the front bumper side mounthing bracket (A) after loosening the screw and bolt.
|
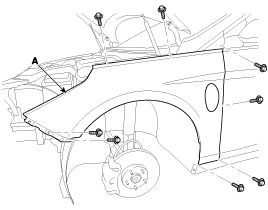
| 7. |
Remove the fender assembly (A) after loosening the nut and bolts.
|
| 8. |
Install in the reverse order of removal.
|

 Hood
Hood
..
Other information:
Hyundai Sonata LF 2014-2019 Service Manual: Muffler Repair procedures
Removal and Installation Front Muffler 1. Disconnect the battery negative terminal. 2. Disconnect the rear oxygen sensor connector (A). 3. Remove the front muffler (A). Tightening torque: 39.2 ~ 58.8 N.m (4.0 ~ 6.0 kgf.m, 28.9 ~ 43.4 lb-ft) 4...
Hyundai Sonata LF 2014-2019 Service Manual: Fuel Filler Cap Description and Operation
Description A ratchet tightening device on the threaded fuel filler cap reduces the chances of incorrect installation, which would seal the fuel filler. After the gasket on the fuel filler cap and the filler neck flange contact each other, the ratchet produces a loud clicking noise indicating the seal has been set...
Categories
- Manuals Home
- Hyundai Sonata Owners Manual
- Hyundai Sonata Service Manual
- Brake System
- Heating, Ventilation and Air Conditioning
- Fuel Delivery System
- New on site
- Most important about car
Copyright © 2025 www.hsonatalf.org