Hyundai Sonata LF: Interior Trim / Front Pillar Trim Repair procedures
Hyundai Sonata LF 2014-2019 Service Manual / Body (Interior and Exterior) / Interior Trim / Front Pillar Trim Repair procedures
| Replacement |
|

|

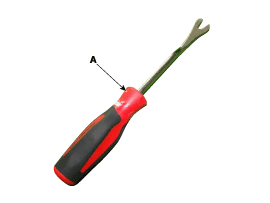
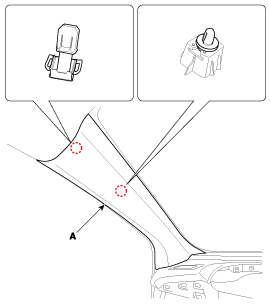
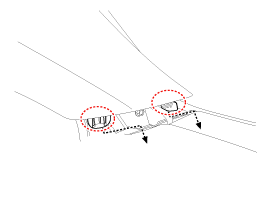
| 1. |
Remove the front pillar trim.
|

| 2. |
Install in the reverse order of removal.
|


Other information:
Hyundai Sonata LF 2014-2019 Service Manual: DCT Control Module (TCM) Description and Operation
Description • Function The Transmission Control Module (TCM) is like the brain for the Dual Clutch Transmission (DCT). It receives information from various sensors for a wide range of transmission controls to provide an optimal driving environment for the driver...
Hyundai Sonata LF 2014-2019 Service Manual: Components and Components Location
C..
Categories
- Manuals Home
- Hyundai Sonata Owners Manual
- Hyundai Sonata Service Manual
- Engine Mechanical System
- Body Electrical System
- Engine And Transmission Assembly
- New on site
- Most important about car

Copyright © 2026 www.hsonatalf.org