
Hyundai Sonata LF: AVN System / AVN(Audio Video Navigation) head unit Repair procedures
Hyundai Sonata LF 2014-2019 Service Manual / Body Electrical System / AVN System / AVN(Audio Video Navigation) head unit Repair procedures
| Removal |
|

| 1. |
Disconnect the negative (-) battery terminal. |
| 2. |
Remove the cluster fascia upper panel.
(Refer to Body - "Cluster Fascia Upper Panel") |
| 3. |
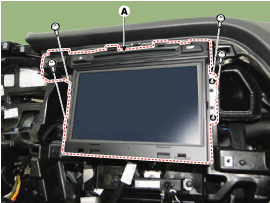
Remove the AVN head unit (A) after loosening the mounting bolts.
|
| 4. |
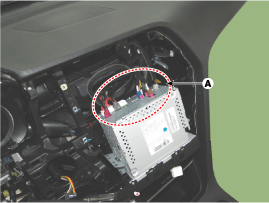
Remove the AVN head unit connectors and cables (A).
|
| Installation |
| 1. |
Install the AVN head unit after connecting the AVN head unit connectors and cable. |
| 2. |
Install the cluster fascia upper panel. |
| 3. |
Connect the negative (-) battery terminal.
|


Other information:
Hyundai Sonata LF 2014-2019 Service Manual: General Information
Specifications Specification Air Conditioner ltem Specification Theta 2.4 GDI Theta 2.0 T-GDI / Gamma 1.6 T-GDI CompressorType6SES14 Oil type & CapacityND8 (PAG) OIL 80 ± 10 cc (2.82 ± 0.35 oz.) Pulley typeDL pulley type (A1 - PD) Displacement140 cc Air pressure transducerPressure valuesVdd * (0...
Hyundai Sonata LF 2014-2019 Service Manual: Electric Parking Brake (EPB) Repair procedures
EPB Release 1. Turn ignition switch OFF and disconnect the negative (-) battery cable. 2. Connect the GDS to the data link connector located underneath the dash panel. 3. Select and operate according to the instructions on the GDS screen. (1) Select vehicle name...
Categories
- Manuals Home
- Hyundai Sonata Owners Manual
- Hyundai Sonata Service Manual
- Cylinder Head Cover Repair procedures
- Brake System
- General Information
- New on site
- Most important about car

Copyright © 2026 www.hsonatalf.org