
Hyundai Sonata LF: Body (Interior and Exterior) / Fender
Components and Components Location
| Component Location |
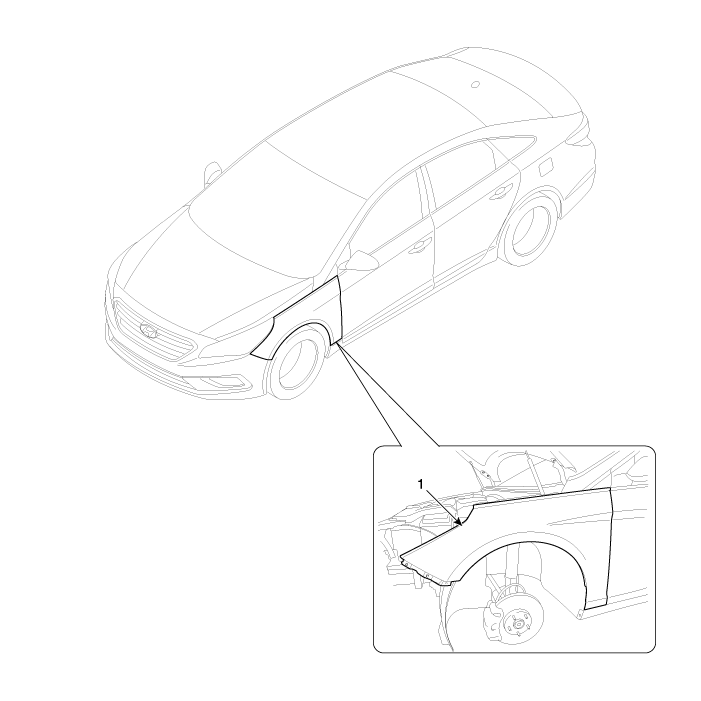
| 1. Fender assembly |
Repair procedures
| Replacement |
|

|

| 1. |
Remove the front bumper.
(Refer to Front Bumper - "Front Bumper Cover") |
| 2. |
Remove the head lamps.
(Refer to Body Electrical System - "Head Lamps") |
| 3. |
Remove the side sill moulding.
(Refer to Body Side Moulding - "Side Sill Moulding") |
| 4. |
Remove the front wheel guard.
(Refer to Body Side Moulding - "Front Wheel Guard") |
| 5. |
Remove the delta garnish.
(Refer to Body Side Moulding - "Delta Garnish") |
| 6. |
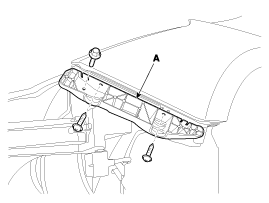
Remove the front bumper side mounthing bracket (A) after loosening the screw and bolt.
|
| 7. |
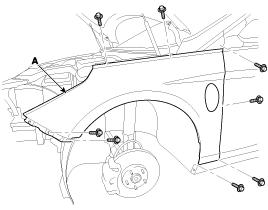
Remove the fender assembly (A) after loosening the nut and bolts.
|
| 8. |
Install in the reverse order of removal.
|

 Hood
Hood
Repair procedures Adjustment 1. After loosening the hinge (A) mounting bolt, adjust the hood (B) by moving it up or down, or right or left. 2. Adjust the hood height by turning the hood overslam bumpers (C)...
Other information:
Hyundai Sonata LF 2014-2019 Service Manual: Fuel Pump Control Module (FPCM) Repair procedures
Removal 1. Turn the ignition switch OFF and disconnect the battery negative (-) cable. 2. emove the rear seat cushion. ( Refer to Body - "Rear Seat Assembly") 3. Remove the fuel pump service cover (A). 4. Disconnect the fuel pump control module connector (A)...
Hyundai Sonata LF 2014-2019 Service Manual: Purge Control Solenoid Valve (PCSV) Specifications
S..
Categories
- Manuals Home
- Hyundai Sonata Owners Manual
- Hyundai Sonata Service Manual
- Body (Interior and Exterior)
- Emission Control System
- Front Driveshaft Repair procedures
- New on site
- Most important about car

Copyright © 2026 www.hsonatalf.org