Hyundai Sonata LF: Blind Spot Detection system / Blind Spot Detection Indicator Repair procedures
Hyundai Sonata LF 2014-2019 Service Manual / Body Electrical System / Blind Spot Detection system / Blind Spot Detection Indicator Repair procedures
| Removal |
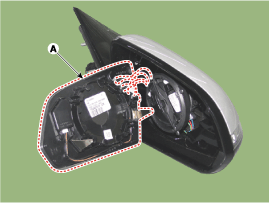
Blind Spot Detection Warnig Indicator
| 1. |
Disconnect the negative (-) battery terminal. |
| 2. |
Remove the mirro (A).
|
| Installation |
Blind Spot Detection Warnig Indicator
| 1. |
Install the outside mirror. |
| 2. |
Connect the negative (-) battery terminal. |
| Inspection |
Diagnosis with GDS
| 1. |
The wiring harness system on the body can check the failed parts more rapidly with tester for the vehicle (GDS).
The tester (GDS) provides the following information.
|
| 2. |
Select the 'Car model' and the system to be checked in order to check the vehicle with the tester. |
| 3. |
Select the module to be checked after selecting BCM.
|

| 4. |
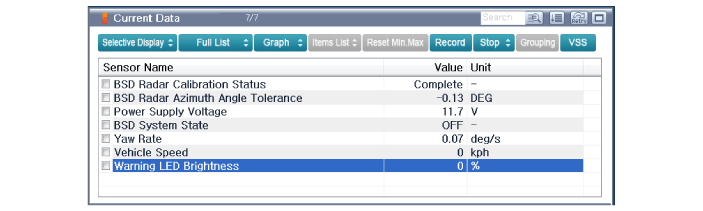
Select the 'Input/Output Monitoring" menu to search the current state of the input/output data.
The input/output data for the sensors corresponding to BSD warning indicator can be checked.
|
| 5. |
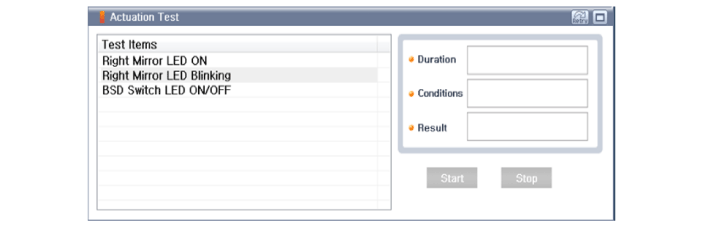
If you will check the BSD warning indicator LED or switch forcefully, select "Actuation Test".
|
| 6. |
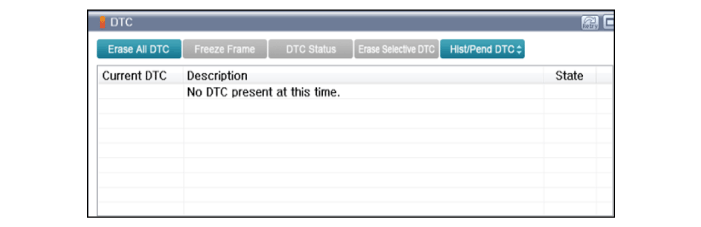
To check the DTC of the Blind Spot Detection (BSD), select "Diagnostic Trouble Codes"
|


Other information:
Hyundai Sonata LF 2014-2019 Service Manual: Injector Specifications
S..
Hyundai Sonata LF 2014-2019 Service Manual: Troubleshooting
Basic Troubleshooting Basic Troubleshooting Guide Customer Problem Analysis Sheet Basic Inspection Procedure Measuring Condition of Electronic Parts' Resistance The measured resistance at high temperature after vehicle running may be high or low...
Categories
- Manuals Home
- Hyundai Sonata Owners Manual
- Hyundai Sonata Service Manual
- Driveshaft and axle
- Alternator Repair procedures
- Suspension System
- New on site
- Most important about car

Copyright © 2026 www.hsonatalf.org