Hyundai Sonata LF: Interior Trim / Door Scuff Trim Repair procedures
Hyundai Sonata LF 2014-2019 Service Manual / Body (Interior and Exterior) / Interior Trim / Door Scuff Trim Repair procedures
| Replacement |
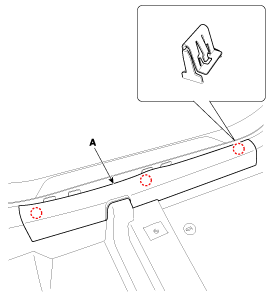
[Front Door Scuff Trim]
|

|

| 1. |
Using a screwdriver or remover, remove the front door scuff tirm (A).
|
| 2. |
Install in the reverse order of removal.
|

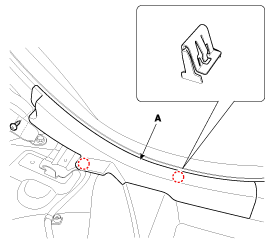
[Rear Door Scuff Trim]
|
|
| 1. |
Using a screwdriver or remover, remove the rear door scuff tirm (A).
|
| 2. |
Install in the reverse order of removal.
|


Other information:
Hyundai Sonata LF 2014-2019 Service Manual: Heater Unit Components and Components Location
Component Location 1. Heater unit assembly Compoents (1) 1. Mode actuator2. Mode bracket plate3. Mine link plate4. Temperature control actuator [LH]5. Washer6. Face door lever7. Foot & Defrost midole lever8. Servo lever arm [LH]9. Door lever arm [LH]10...
Hyundai Sonata LF 2014-2019 Service Manual: Electric Parking Brake (EPB) Repair procedures
EPB Release 1. Turn ignition switch OFF and disconnect the negative (-) battery cable. 2. Connect the GDS to the data link connector located underneath the dash panel. 3. Select and operate according to the instructions on the GDS screen. (1) Select vehicle name...
Categories
- Manuals Home
- Hyundai Sonata Owners Manual
- Hyundai Sonata Service Manual
- Brake System
- Engine Electrical System
- General Information
- New on site
- Most important about car

Copyright © 2026 www.hsonatalf.org