Hyundai Sonata LF: Front Seat / Front Seat Back Cover Repair procedures
Hyundai Sonata LF 2014-2019 Service Manual / Body (Interior and Exterior) / Front Seat / Front Seat Back Cover Repair procedures
| Replacement |
|

|

| 1. |
Remove the front seat assembly.
(Refer to Front Seat - "Front Seat Assembly") |
| 2. |
Remove the front seat outer shield cover.
(Refer to Front Seat - "Front Seat Outer Shield Cover") |
| 3. |
Remove the front seat shield inner cover.
(Refer to Front Seat - "Front Seat Shield Inner Cover") |
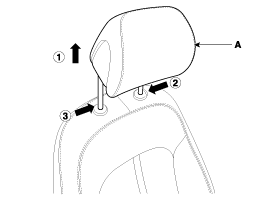
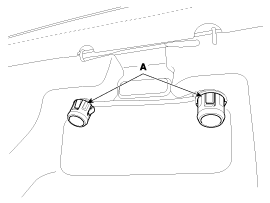
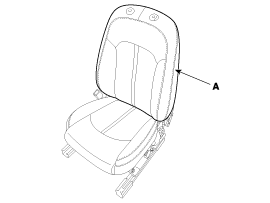
| 4. |
Remove the front seat headrest (A).
|
| 5. |
Remove the elastic strap (A) from the cushion frame.
|
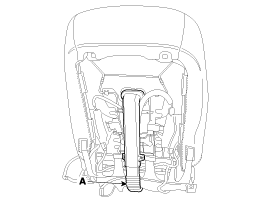
| 6. |
Remove the front seat back board (A).
|
| 7. |
Remove the front seat air ventilation seat back duct (A).
|
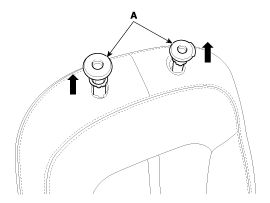
| 8. |
Turn the front seat back cover inside out. Then pull out the
headrest guides (A) while pinching both side of the lower part of the
guides, and remove them.
|
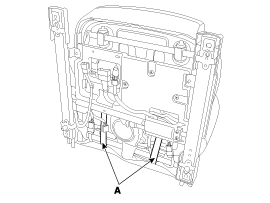
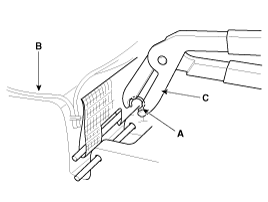
| 9. |
Pull out the protecter (A) by the front seat back frame.
|
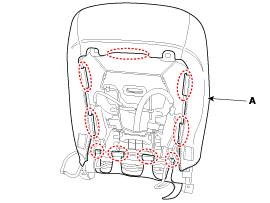
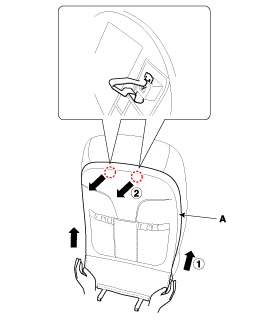
| 10. |
Remove the front seat back cover (A) from the front seat back frame.
|
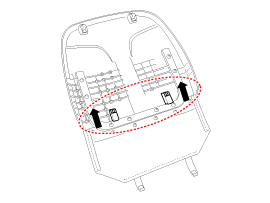
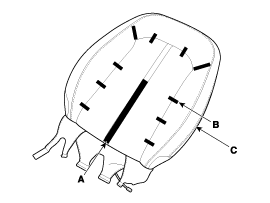
| 11. |
After removing the velcro tape (A) and clips (B) on the front of seat back and remove the front seat back cover (C).
|
| 12. |
Install in the reverse order of removal.
|


Other information:
Hyundai Sonata LF 2014-2019 Service Manual: Electric Parking Brake (EPB) Description and Operation
Description The EPB is an electronic parking brake. The EPB is different from existing parking systems which operated with the brake pedal or the lever type. The EPB system sends the signal to the ECU when a driver operates the EPB switch. The ECU operates the EPB actuator composed with motor gears...
Hyundai Sonata LF 2014-2019 Service Manual: Water Jacket Seperator Components and Components Location
C..
Categories
- Manuals Home
- Hyundai Sonata Owners Manual
- Hyundai Sonata Service Manual
- Front Driveshaft Repair procedures
- Repair procedures
- Engine Electrical System
- New on site
- Most important about car

Copyright © 2026 www.hsonatalf.org