Hyundai Sonata LF: Interior Trim / Door Scuff Trim Repair procedures
Hyundai Sonata LF 2014-2019 Service Manual / Body (Interior and Exterior) / Interior Trim / Door Scuff Trim Repair procedures
| Replacement |
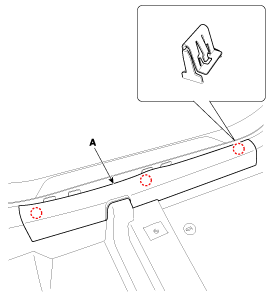
[Front Door Scuff Trim]
|

|

| 1. |
Using a screwdriver or remover, remove the front door scuff tirm (A).
|
| 2. |
Install in the reverse order of removal.
|

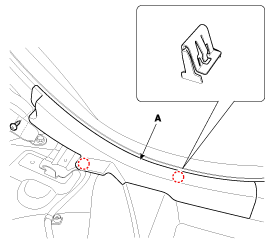
[Rear Door Scuff Trim]
|
|
| 1. |
Using a screwdriver or remover, remove the rear door scuff tirm (A).
|
| 2. |
Install in the reverse order of removal.
|


Other information:
Hyundai Sonata LF 2014-2019 Service Manual: Crankshaft Position Sensor (CKPS) Repair procedures
Inspection 1. Check signal waveform of CKPS and CMPS using a GDS. Specification: Refer to “Waveform” Removal 1. Turn the ignition switch OFF and disconnect the battery negative (-) cable. 2. Disconnect the crankshaft position sensor connector (A) and remove the sensor (B) after removing the installation bolt...
Hyundai Sonata LF 2014-2019 Service Manual: Rear Door Outside Handle Repair procedures
Replacement 1. Remove the hole plug (B). 2. After loosening the mounting bolt, then remove the rear door outside handle cover (A). Tightening torque : 6.9 ~ 10.8 N.m (0.7 ~ 1.1 kgf.m, 5.1 ~ 8.0 lb-ft) 3. Remove the rear door outside handle (A) by sliding it rearward...
Categories
- Manuals Home
- Hyundai Sonata Owners Manual
- Hyundai Sonata Service Manual
- Engine Control System
- Brake System
- Engine Electrical System
- New on site
- Most important about car

Copyright © 2026 www.hsonatalf.org